

Learn how to make the best crispy dosa from scratch with homemade dosa batter. I have shared all the tips and tricks to get the perfect crispy dosa’s every time!
My family loves South Indian food, and recently the girls have been all about dosa. They love dosa so much, and would eat it every day!
I have gotten numerous requests for a dosa recipe (ever since I shared about making dosa on Instagram). I make it so often, just never got around to sharing it here. So here it is today!
This is the plain dosa orsada dosa recipe. You can easily tailor this recipe to make masala dosa, ghee podi dosa, or cheese dosa. I have also shared my quinoa dosa recipe.
I had shared my idli dosa batter recipe a long time ago, and it has been loved by all of you. This recipe is excellent if you want to make one batter for both idlis and dosas.
This time, I am sharing the batter, which is more tailored to making dosa and uttapams. You will achieve even crisper dosas with this recipe.
This recipe for the dosa batter is from my friend’s mom, who specifically makes separate batter for dosa this way, and for idlis uses idli rava.
I use the Vitamix blender to grind the batter. Then, the batter can be fermented in the Instant Pot or in a warm place, such as an oven with the lights on, if you live in a cool climate.
After trying this batter and seeing how easy it is, you will never buy dosa batter from the store. I make the batter once over the weekend and use it throughout the week to make dosas and uttapams.
If you are new to making dosa and batter at home, then I highly suggest reading the whole post, as I am sharing lots of tips to get the perfect crispy dosas.
Also, remember that compared to idlis, batter for dosa is much more forgiving. So that is definitely a good motivation to try it out 🙂
Okay…let’s get straight to the recipe!
Table of contents
Before You Start
- Use the right kind of rice, and also add the chana and toor dal to the batter. This helps to get crispy dosa.
- Use very cold water or ice cubes when grinding the batter, as that helps prevent the batter from heating up when grinding.
- Use clean hands to mix the batter after adding salt. This helps the batter to ferment properly.
- If using the Instant Pot to ferment batter, do not increase the quantity much more than double this recipe. I have seen some posts where the batter has risen too much, and the Instant Pot has locked. I also recommend using a glass lid to close the Instant Pot in yogurt mode when making batter.
How to make Dosa Batter?
The first step is to make the dosa batter. This is also called dosa khi or maavu.
Dosa Ingredients
Determining the correct proportion of dal and rice for dosa batter is a crucial first step. And also which rice and dals to use.
Rice: There are some options here. You can use regular Sona Masoori rice or Idli Rice (parboiled rice). You can also use a combination of equal parts of Idli Rice and Sona Masoori rice. You will also find dosa rice in stores that can be used.
The taste of the dosa and the crispiness vary with the rice used. I have used all of them and have been able to make great crispy dosa with them.
Dal: Use whole urad dal (gota) or split urad dal (dhuli) for batter. This is dehusked black gram lentils. I also add Chana Dal and Toor Dal. This makes the dosa even more crispy.
Poha: Poha is flattened rice. I like to add poha to the batter, as it helps make crispy dosas.
Fenugreek seeds: I also add fenugreek seeds (methi seeds) when making the batter. This was a tip from my South Indian friend’s mom, that it helps with fermentation.
Rock Salt: I add rock salt (sendha namak) to the batter. Make sure not to use iodized salt, as that affects the fermentation process.
Dal and Rice Ratio for Batter
I use a ratio of 1:3 for dal to rice. So 1/2 cup of urad dal and 1-1/2 cups of rice.
As I mentioned earlier, I also use one tablespoon each of Chana Dal and Toor Dal in this recipe.
Soaking Rice and Dal
When making batter for idli, it is required to soak the dal and rice separately. However, it is not necessary to do that when making only dosa.
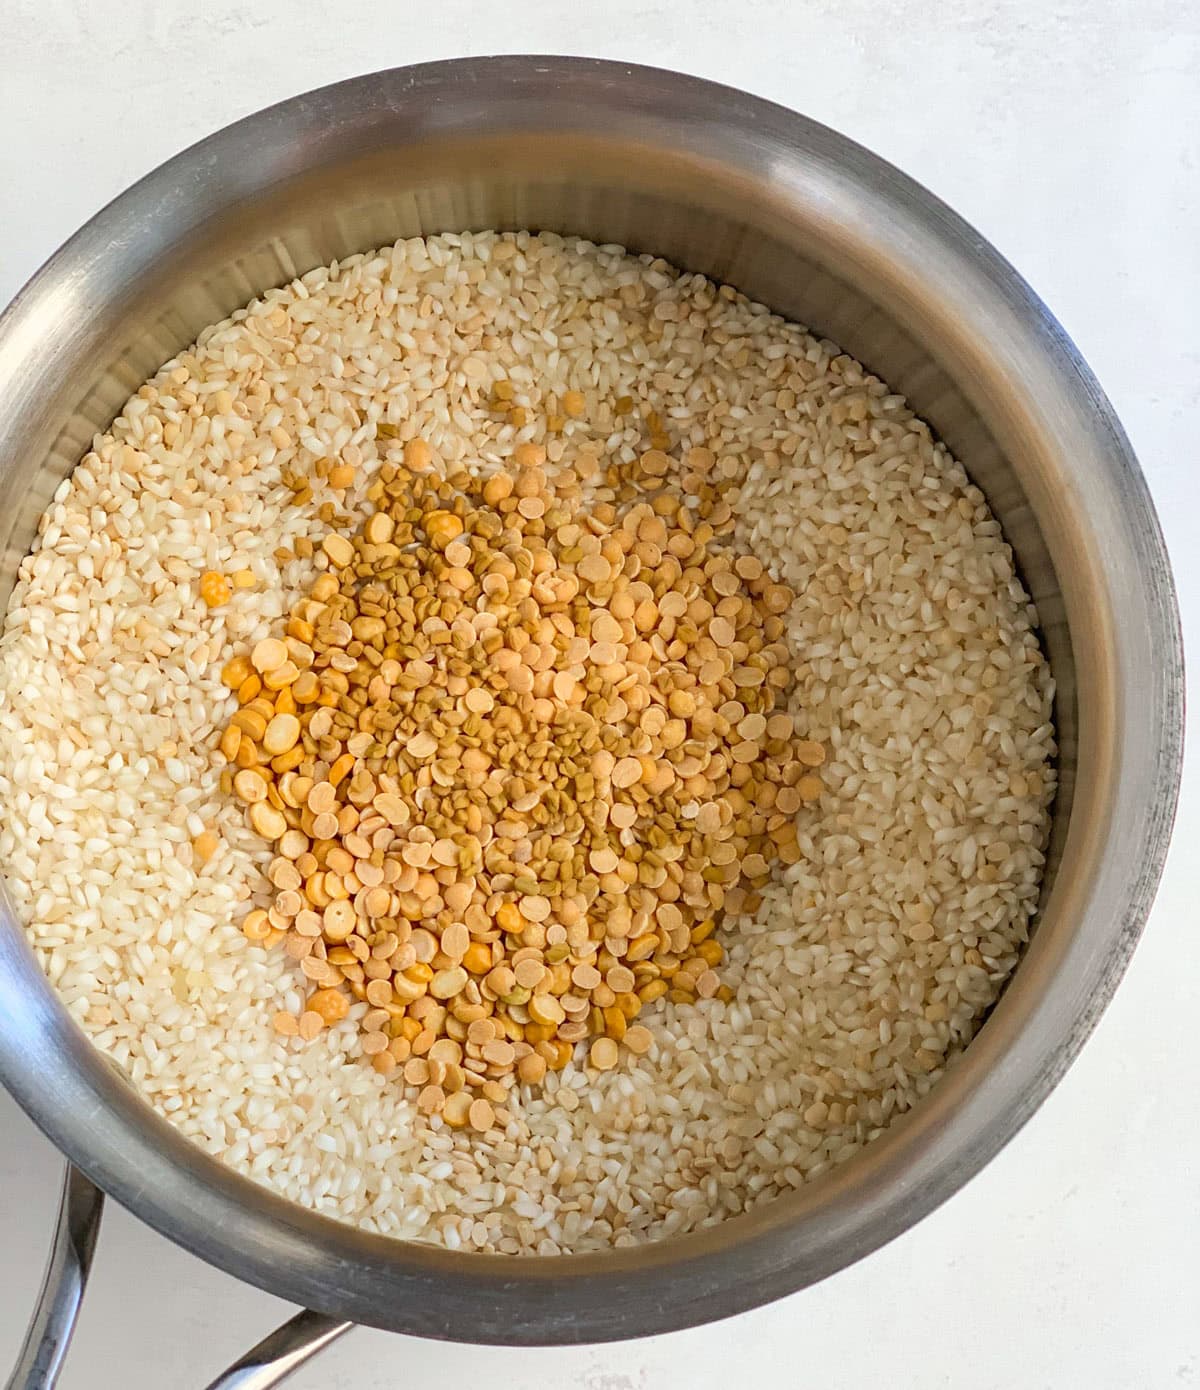
Add urad dal, rice, chana dal, toor dal, and methi seeds to a large bowl.
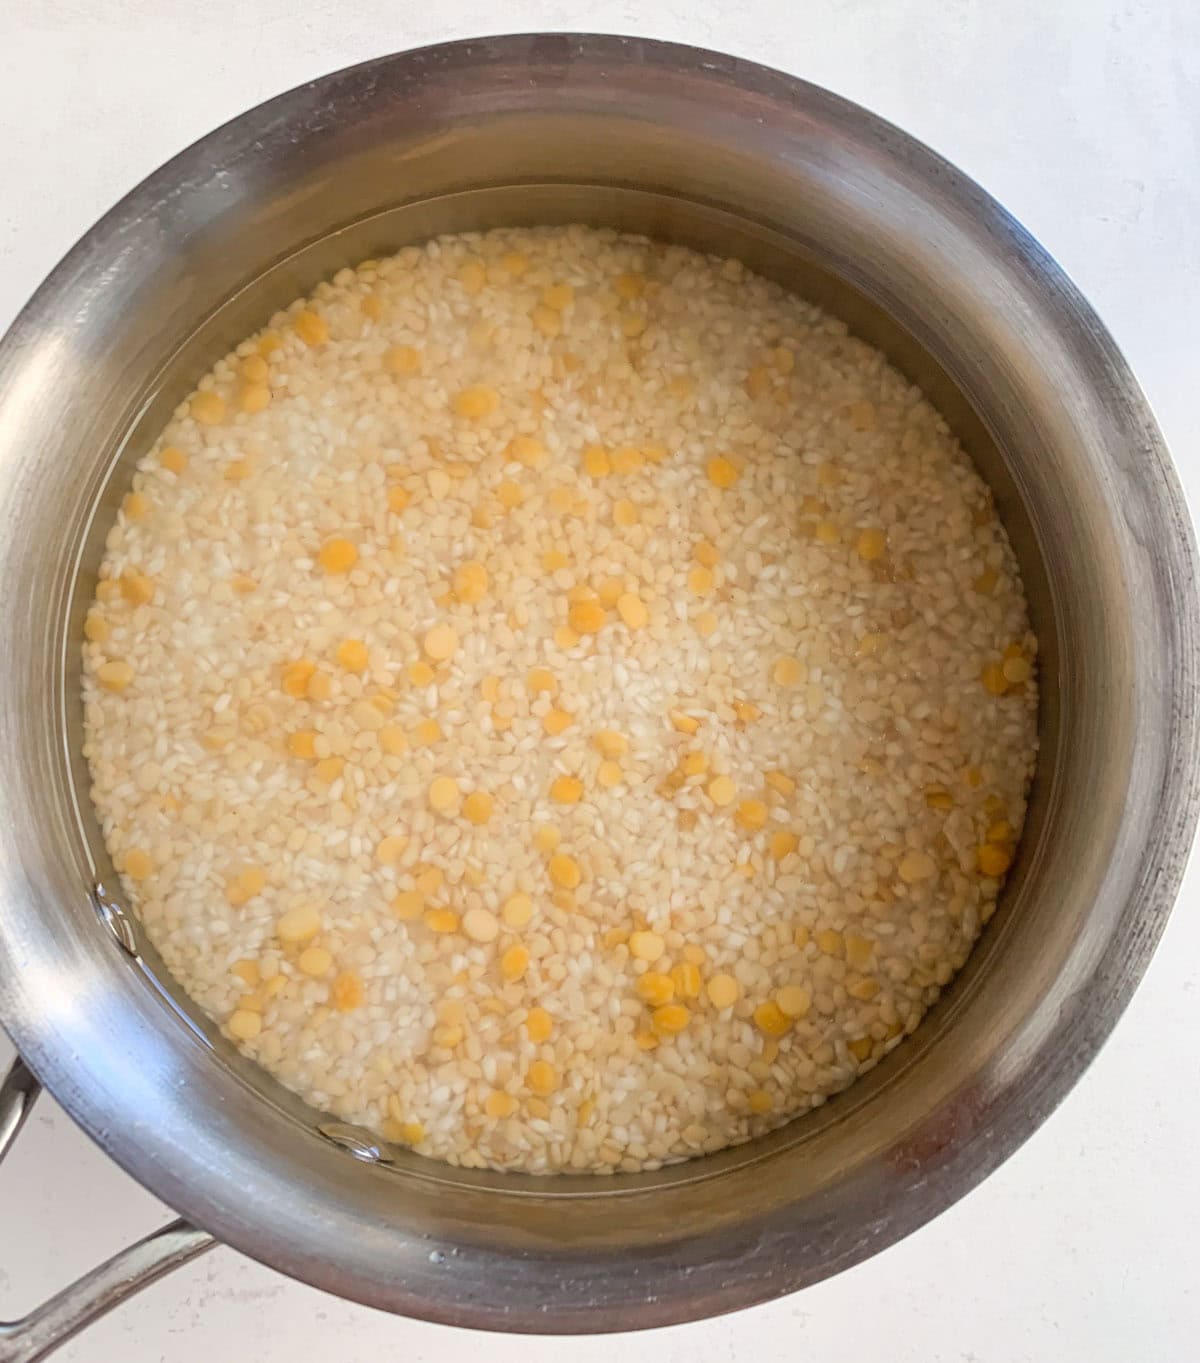
Rinse till the water runs clear. Soak in about 6 cups of water for 4-5 hours.
Grinding the Dosa Batter
In South India, people use a wet grinder to grind batter. However, I personally don’t want to have a separate gadget to make batter, so I use a high-performance blender (Vitamix) to grind the batter. You need a strong grinder that can make the batter very fine, while not heating it up.
Soak poha in water for about 20 minutes before grinding the batter.
Drain water from the soaked dal and rice, and from the poha. Transfer all to a high-speed blender jar.
Add cold water or ice as needed to grind the batter to a smooth paste. It is crucial to add cold water, as we don’t want the batter to heat up, as that can hinder proper fermenting.
Add about 3/4 to 1.5 cups of cold water. Start with less water and add as needed. Transfer the batter to a large steel bowl or the Instant Pot steel insert. Make sure to use a large bowl so there is ample space for the batter to rise.
Add rock salt (sendha namak) to the batter. You can skip salt here if you live in a warm place. Make sure not to use iodized salt, as that affects the fermentation process.
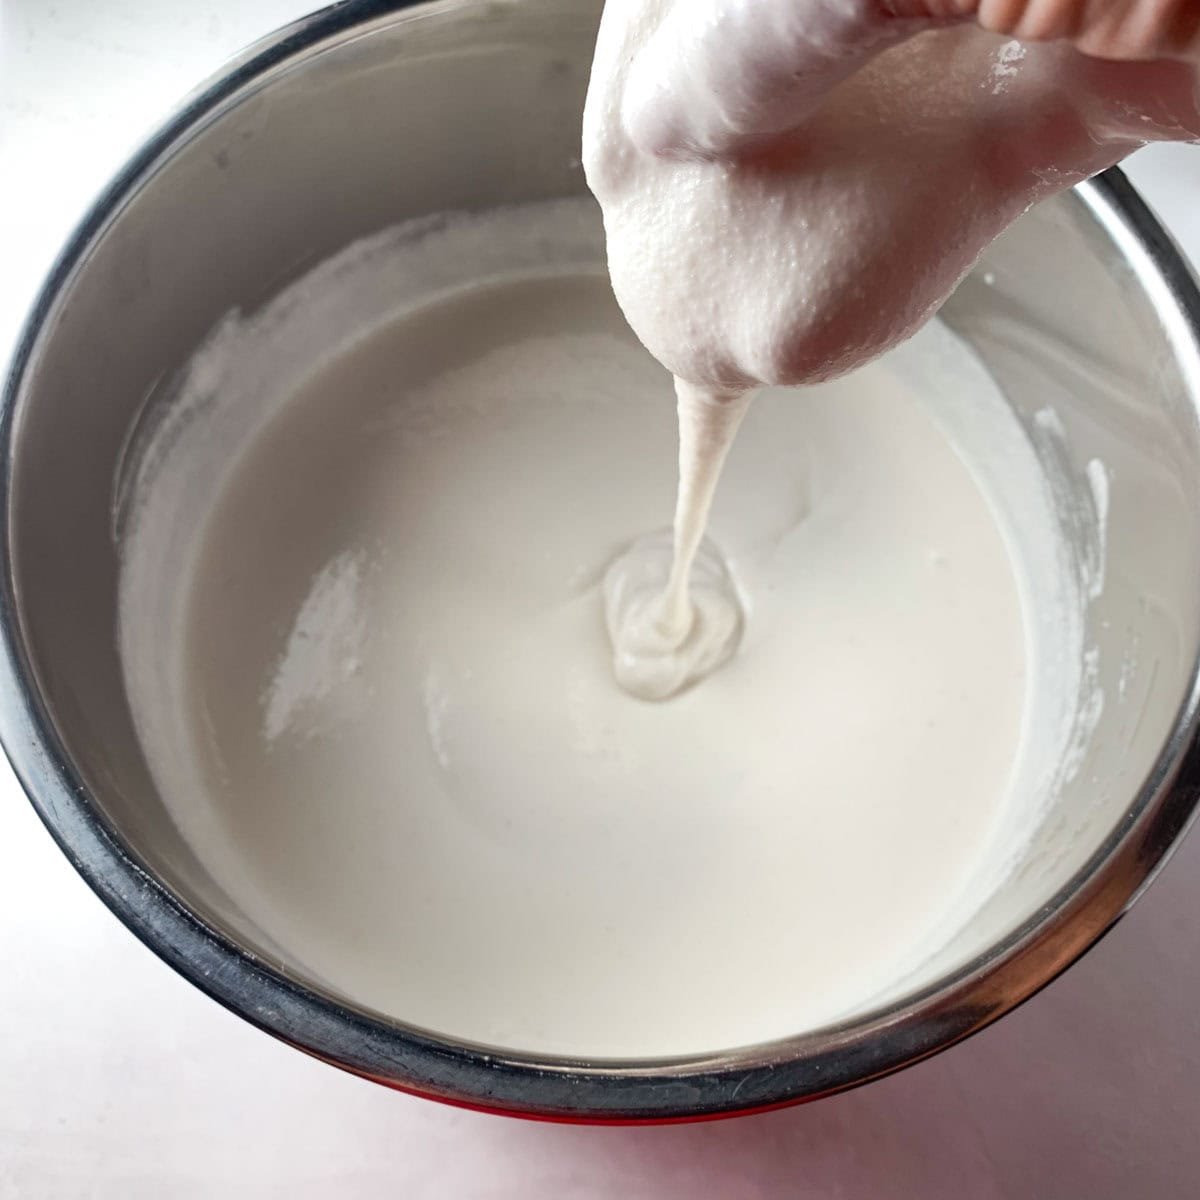
I got the tip from my friend that you want to mix the batter well with your clean hands, as that adds a little warmth to the batter, which is helpful for fermentation. When mixing, if the batter feels too warm, you can add a little ice to cool it down.
Tip: The consistency of the batter should be as shown in the picture below. Flowing easily, but not runny and not too thick. If yours is thick, then add some ice cubes or cold water and mix well with your hands.
Fermenting Dosa Batter
You can ferment the batter in a warm place. Cover the steel bowl with a lid and place it in a warm place. If you live in a cold climate, keep it in the oven with the lights on or on the counter in a warm climate.
In normal or warm climate regions, you can ferment on the countertop. It can take anywhere from 8 hours to overnight to ferment the batter, depending on the outside temperature.
However, in cold regions, you can keep the batter to ferment in the oven with the lights on. The light gives enough warmth to ferment the batter. When I keep it in the oven, it takes about 12 hours to ferment the batter well.
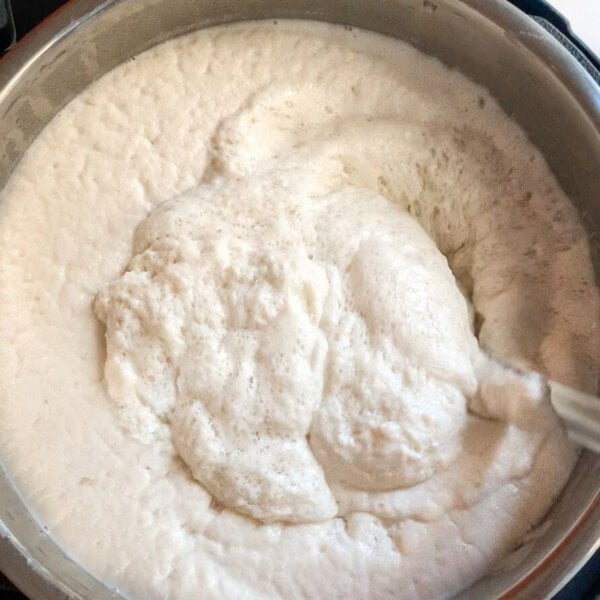
Fermenting Dosa Batter in Instant Pot
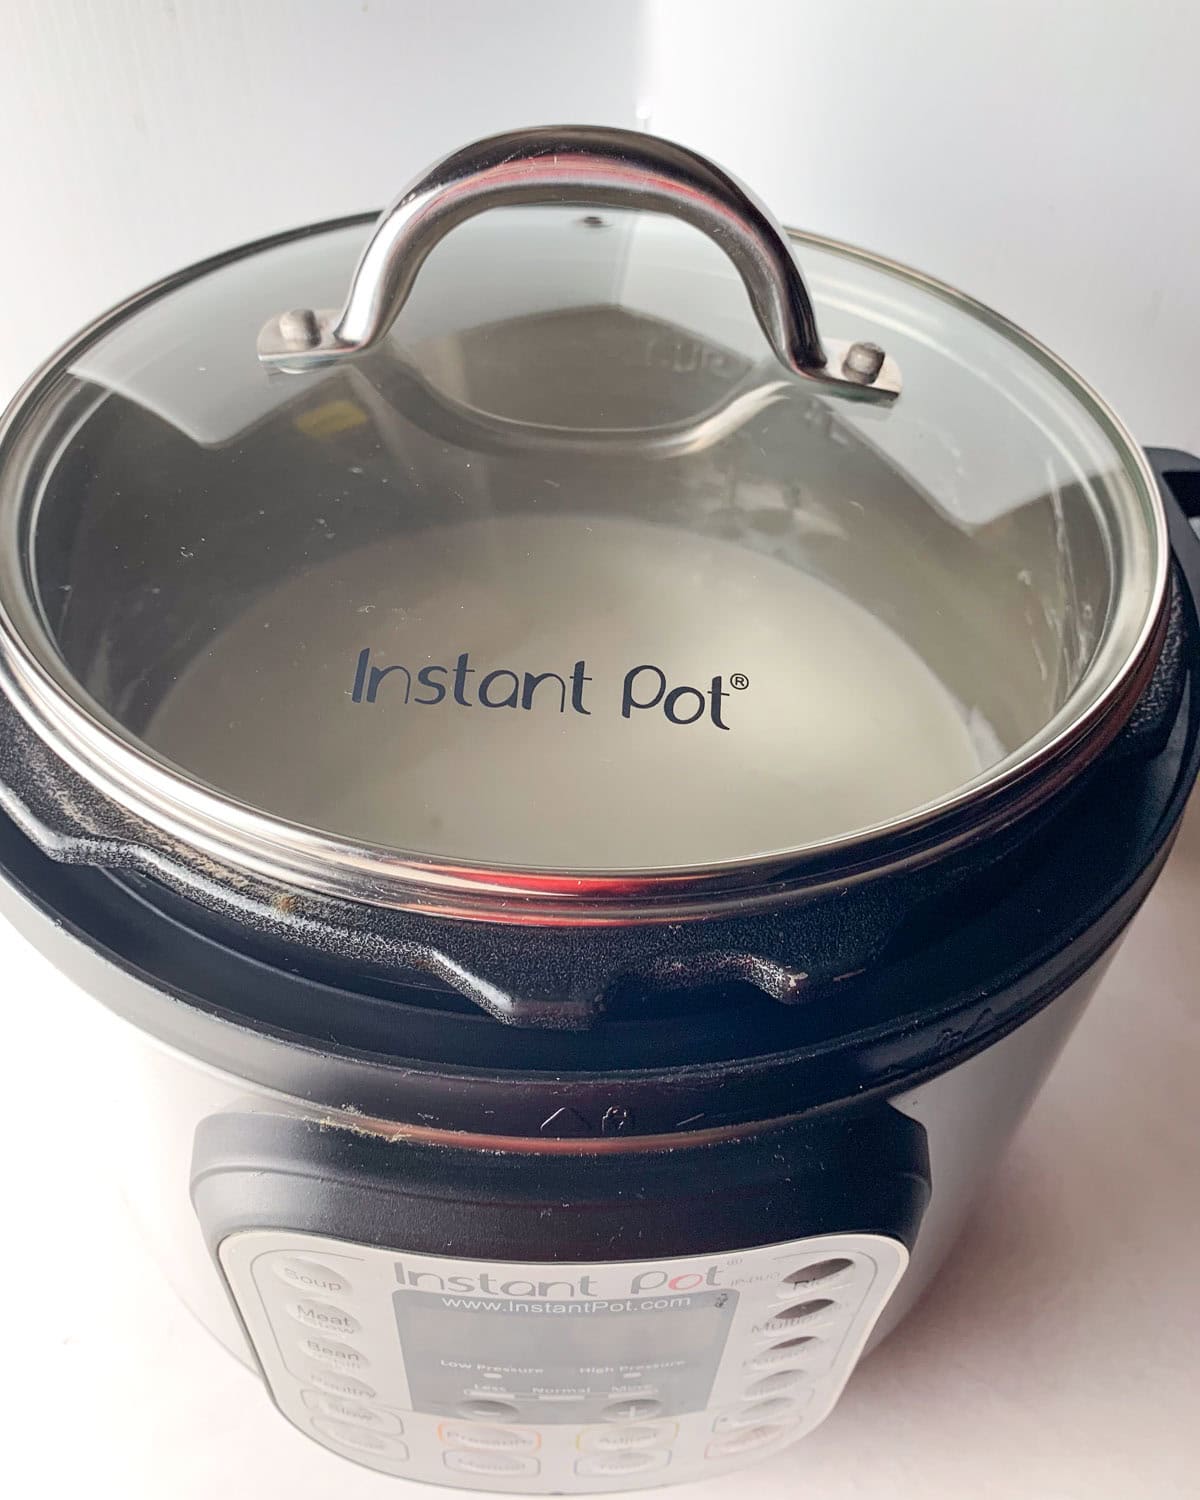
If you have an Instant Pot, you can use the “Yogurt” mode to ferment the batter.
Start the Instant Pot in the “Yogurt” mode on the normal setting. Press adjust until the display shows 8 hours. Then press “+” to change to 12 hours. Cover the Instant Pot with a glass (or steel) lid and let the batter ferment.
Note: It is essential to use a glass lid, and not the Instant Pot lid, as sometimes the batter can overflow and lock the lid.
After 10 hours, the batter should have risen well. If it has not risen enough, leave for a couple of more hours.
I get the question many times about how long it takes to ferment the batter perfectly. The answer is it depends on where you live. It can range from 6 to 14 hours. It takes me about 12-14 hours, but you would need less time if you live in a warm place.
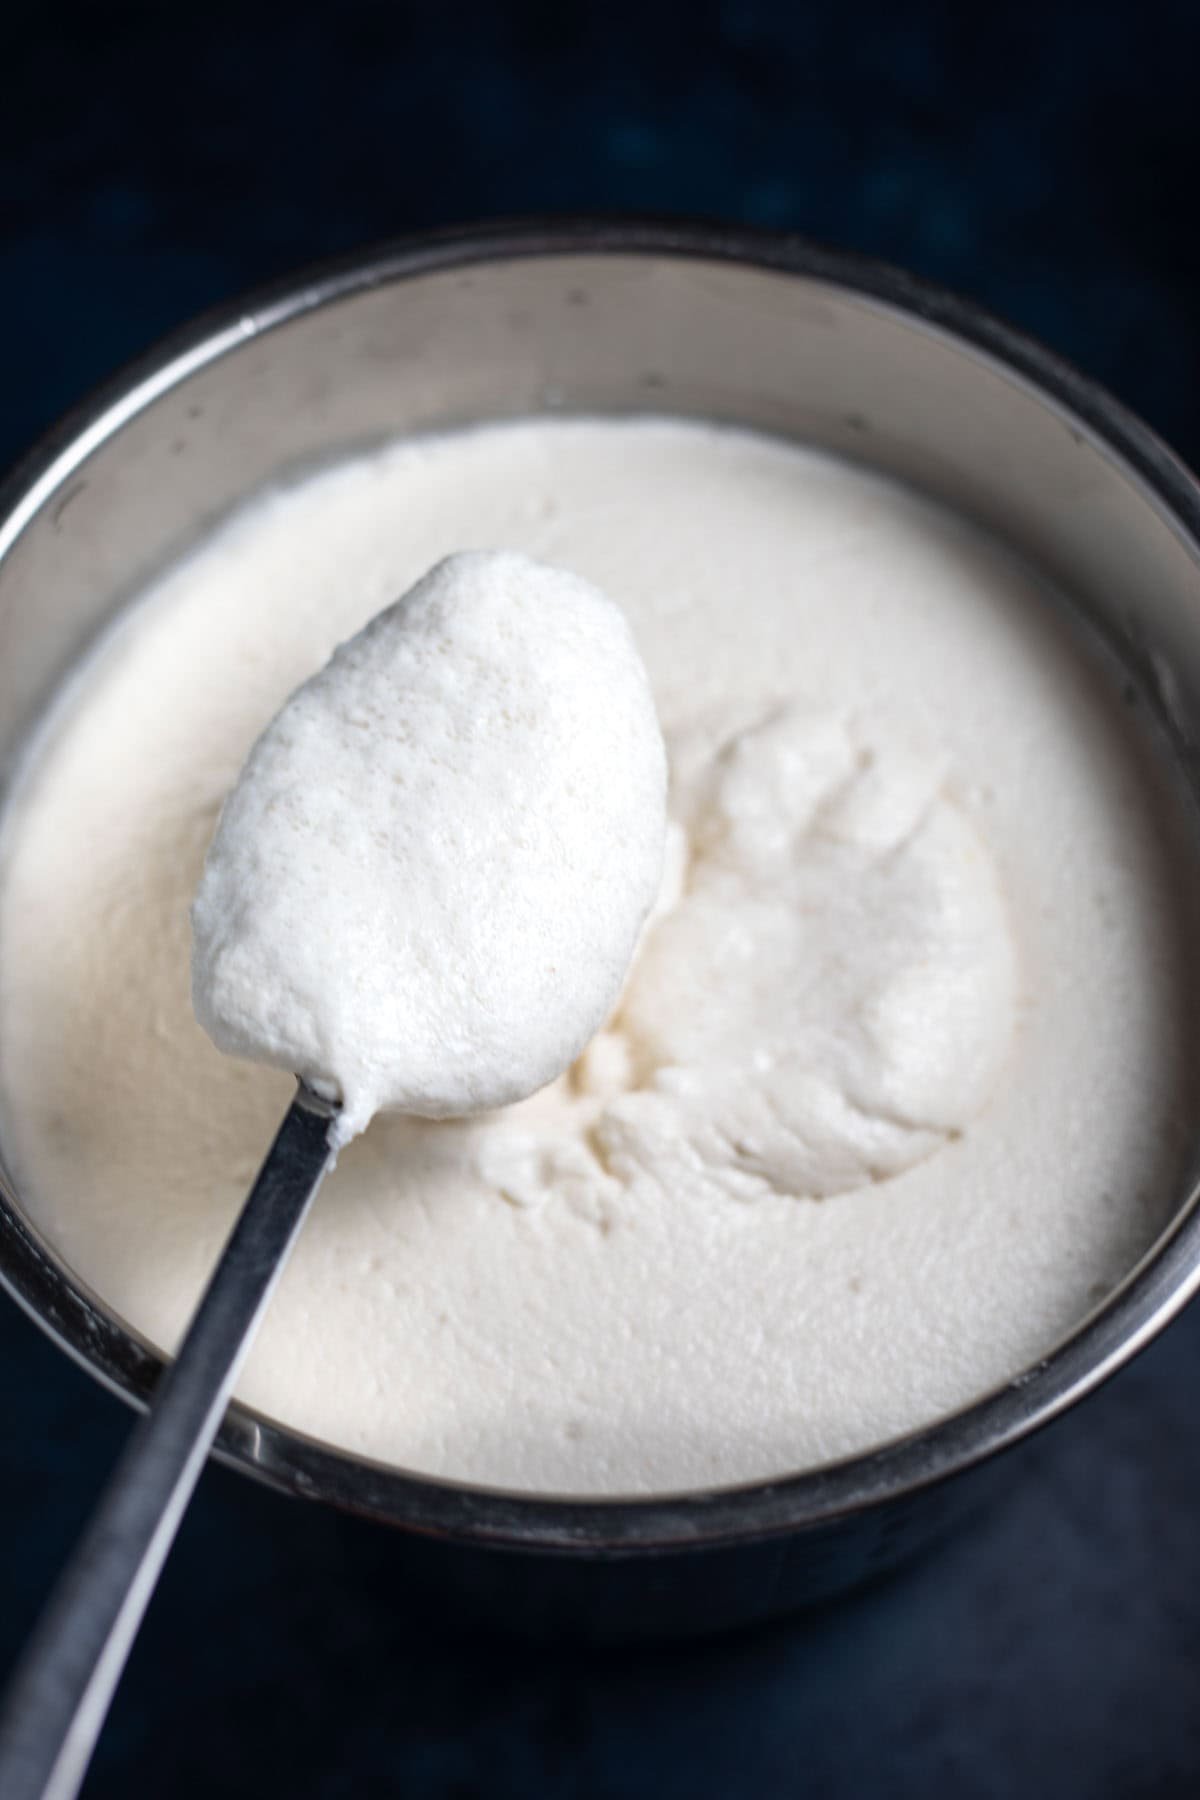
Once the batter is fermented, it should have increased in volume and must be frothy and airy with some bubbles.
You can check if the batter is fermented well by dropping a teaspoon of batter into a bowl of water. It should float on top and not sink.
Stir the batter. You can transfer the batter needed to make dosa to a bowl. You can store this batter in the refrigerator in an airtight container for up to 5 days.
Dosa Pan (Tawa)
I use a cast-iron griddle (referred to as a tawa here) to make dosas. You can also use a non-stick dosa tawa, but cast iron is best to make crispy dosa’s.
You want to make sure the cast-iron pan is seasoned well; otherwise, the dosa will stick to it. Check here on how to season a cast-iron pan. Also, cast-iron pans get better with use, so if you have a new pan, don’t give up and keep using it.
How to Make Dosa?
Stir the batter you have taken in a bowl to make dosa. Make sure it is pouring consistency. You might need to add some water, as sometimes the batter becomes thicker while fermenting. If you skipped salt when fermenting, then add it now and mix well.
Heat the pan on medium-high heat. Ensure the tawa is heated well before making dosas. You can sprinkle some water on it, and it should sizzle right away.
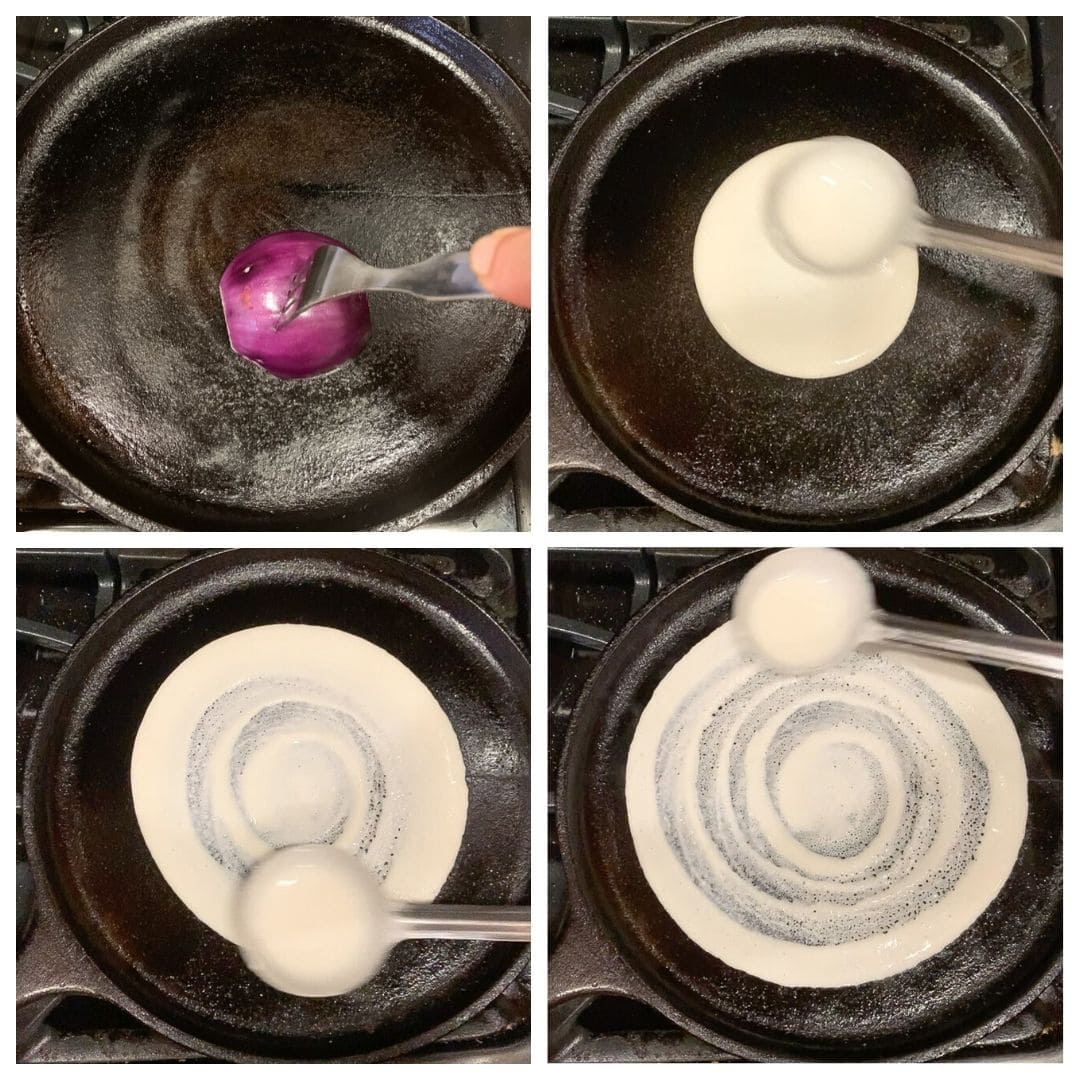
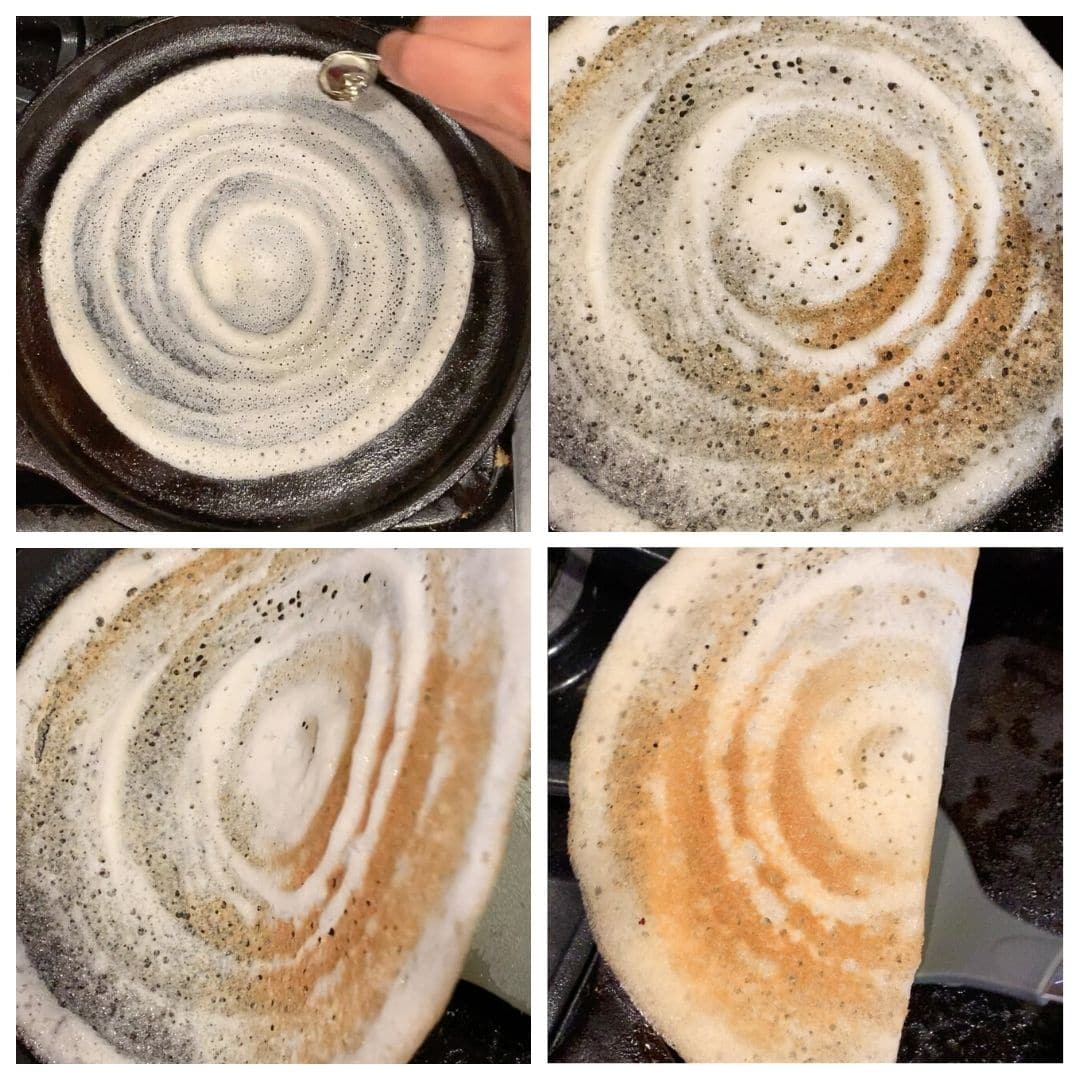
Put a few drops of oil on the tawa and spread it with a paper towel all over the tawa. You can also use an onion cut in half and use the flat side to spread the oil. This helps to cool down the tawa and spread the batter in a thin layer. Lower the heat a little while spreading the batter, and change back to medium-high right after spreading the batter.
Take a ladle full of the batter and pour it at the center of the tawa. Immediately start to spread the batter from the center out in a circular motion in one direction (I prefer clockwise). Try to spread as thin as possible for a crispy dosa.
If you are new to making dosa, don’t worry if you can’t spread it perfectly at first. It comes with practice.
Drizzle oil or ghee around the edges of the dosa and also some at the center. Let it cook until the dosa becomes golden brown and starts to leave or come out from the edges.
You typically only need to cook one side of the dosa. If you have spread the dosa thick, then you might want to flip it and cook on the other side.
Use a flat spatula to remove the dosa from the edges. You can roll the dosa or fold it at the center with the spatula. Remove from the pan and serve immediately.
To make masala dosa, you can also add potato masala to the dosa while it is cooking on the griddle. Spread a little masala at the center of the dosa before taking it out from the edges and folding it.
My daughter likes to have cheese dosa, so I spread some grated cheddar or mozzarella cheese on top while the dosa is cooking on the tawa.
Before making the next dosa, wipe the tawa with a paper towel and (optionally use the onion). Then spread the dosa, then increase the heat to high.
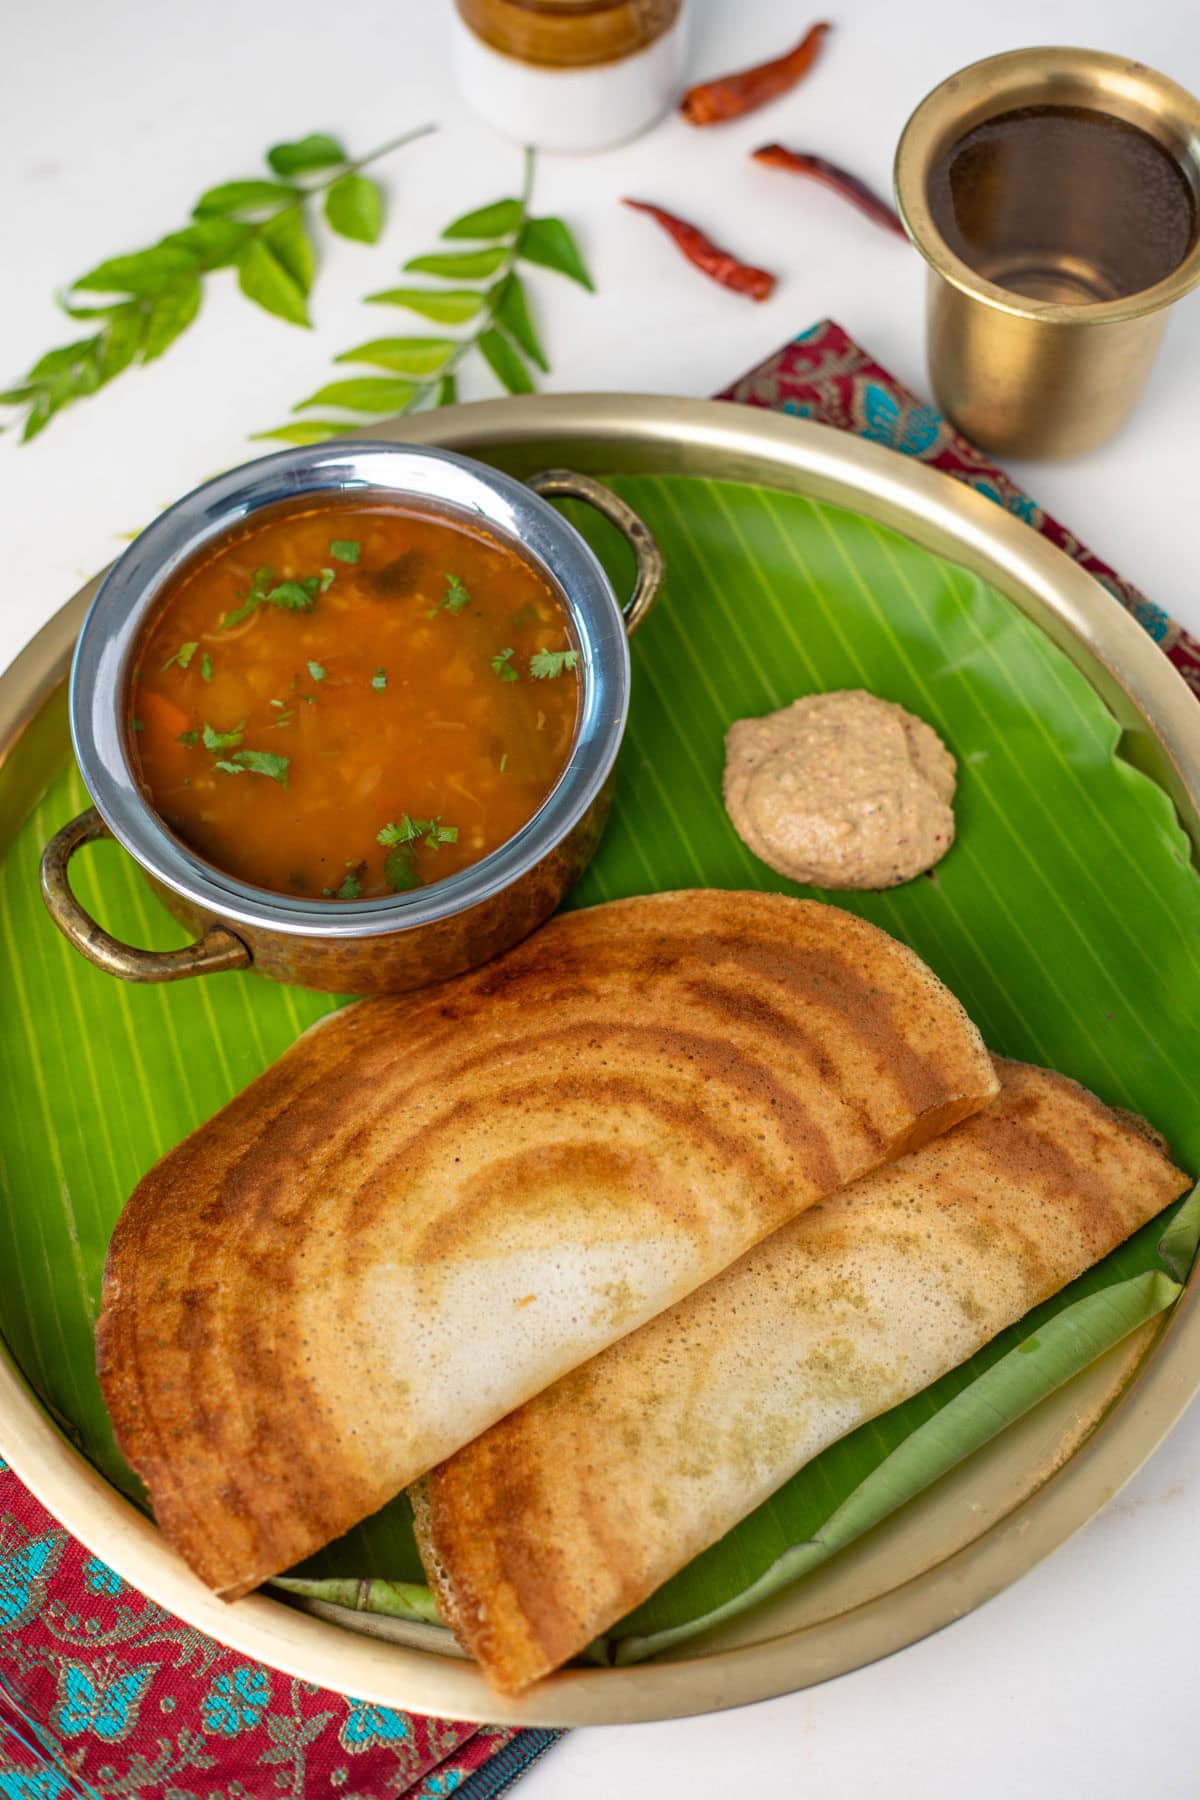
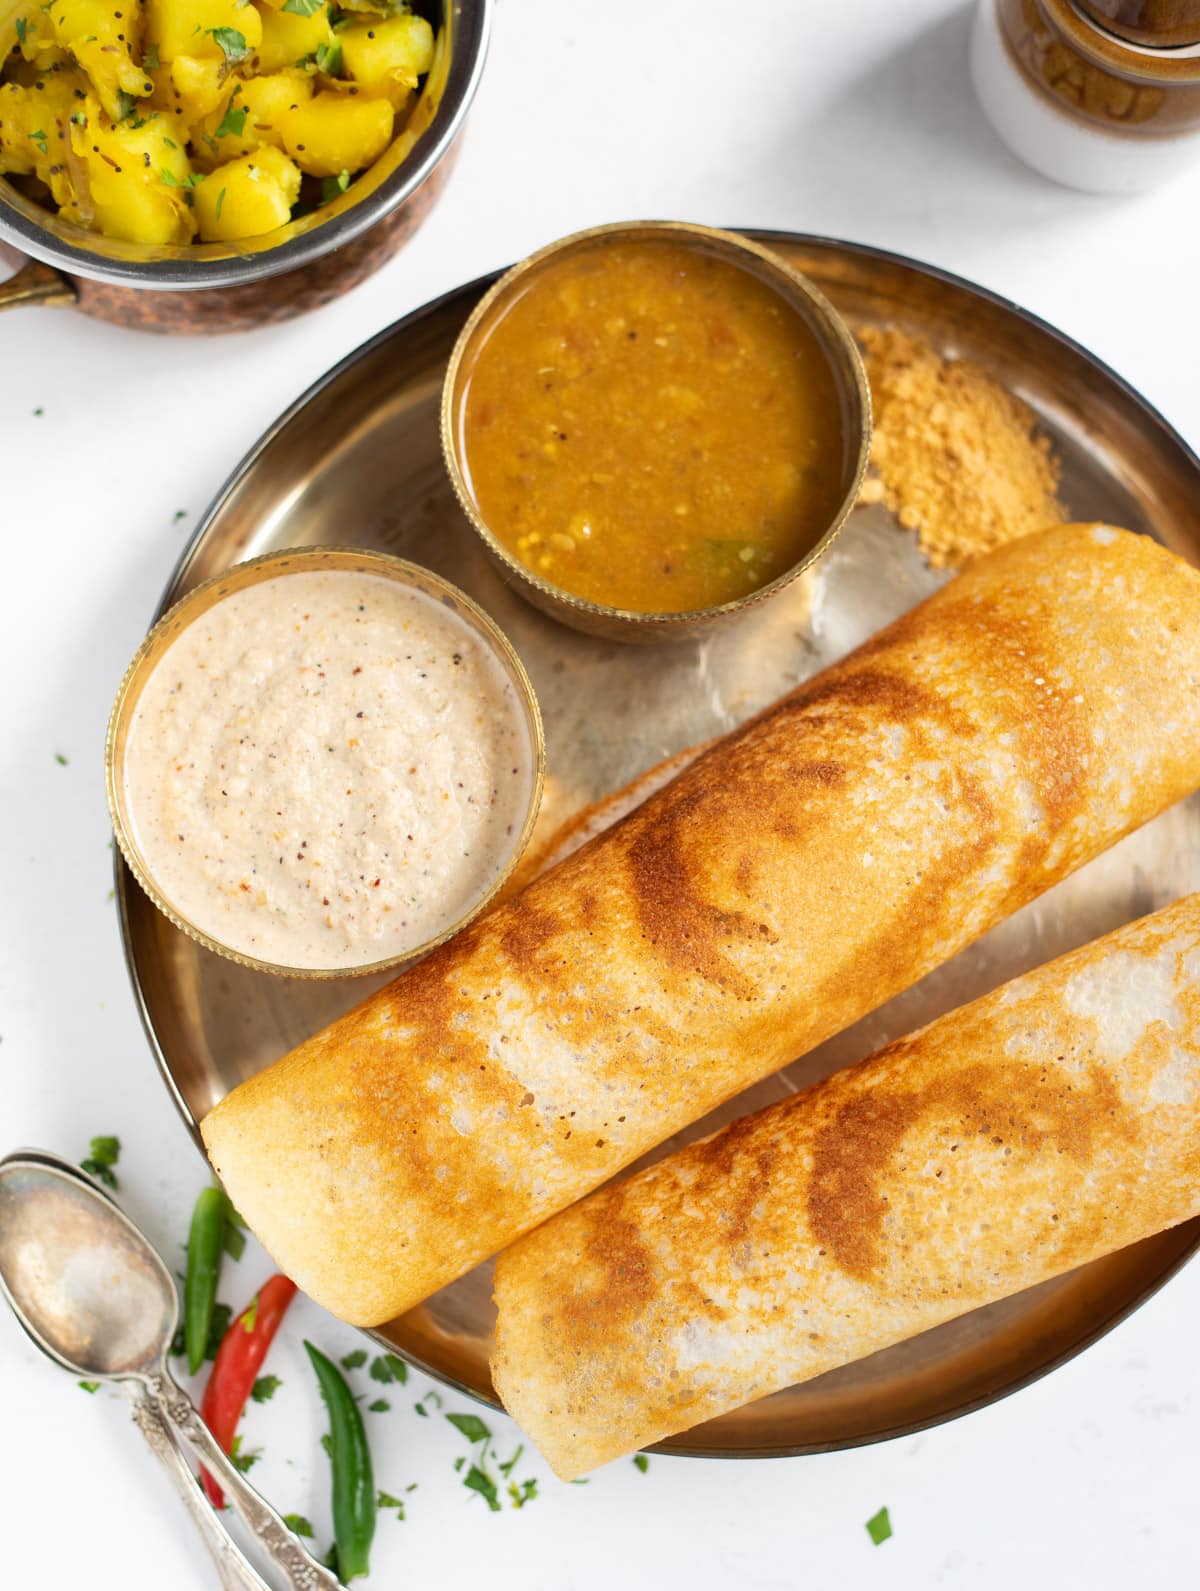
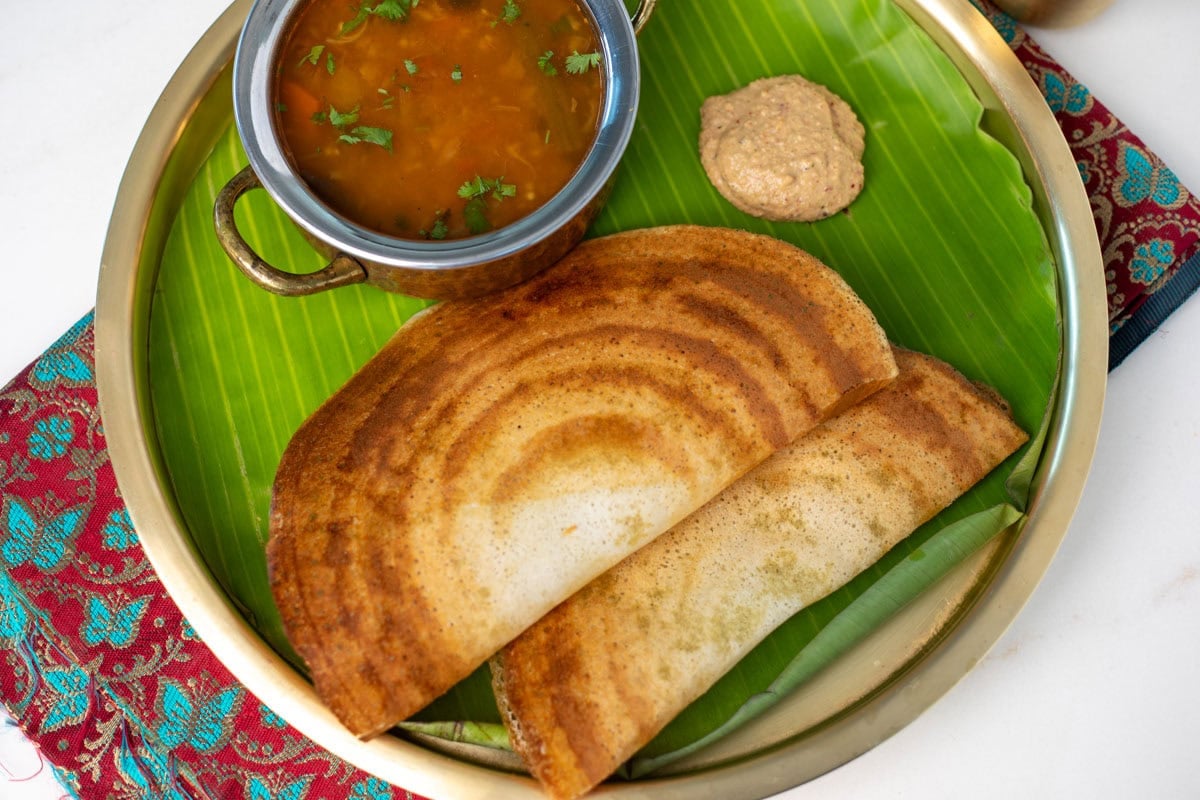
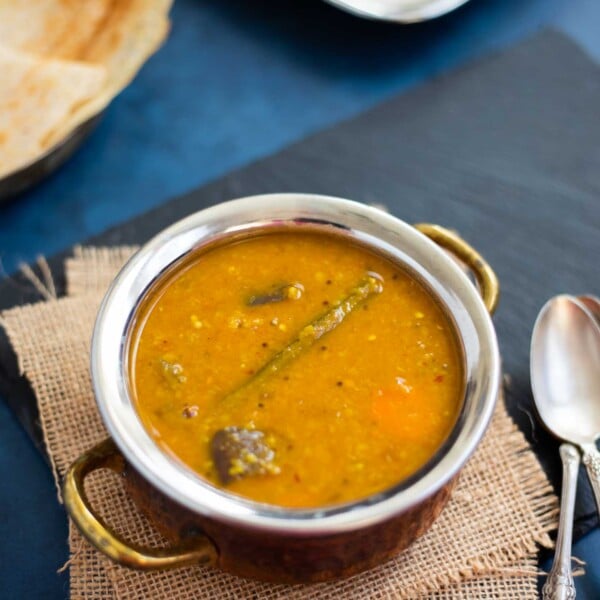
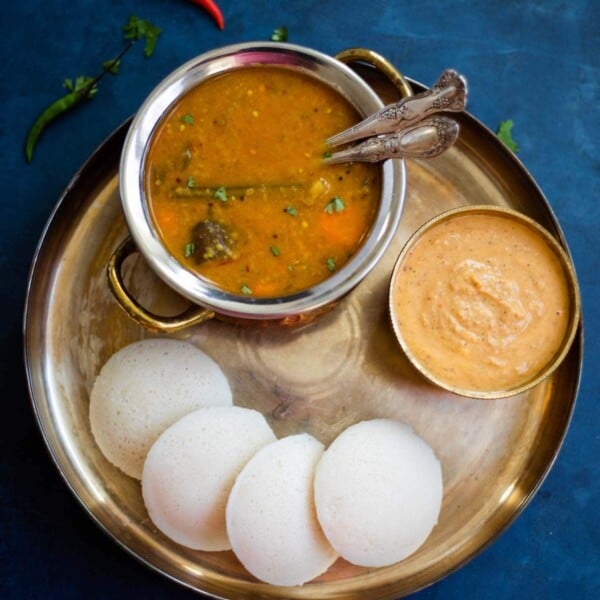
Serve dosa with sambar, chutney, and potato masala.
Making Cone Dosa
I used to always ask for a cone-shaped dosa at restaurants when I was a kid. They also used to have ghee dosa or butter dosa, which is essentially the same as a regular dosa, but with ghee/butter used in place of oil when making it. You can also use this batter to make Uttapam.
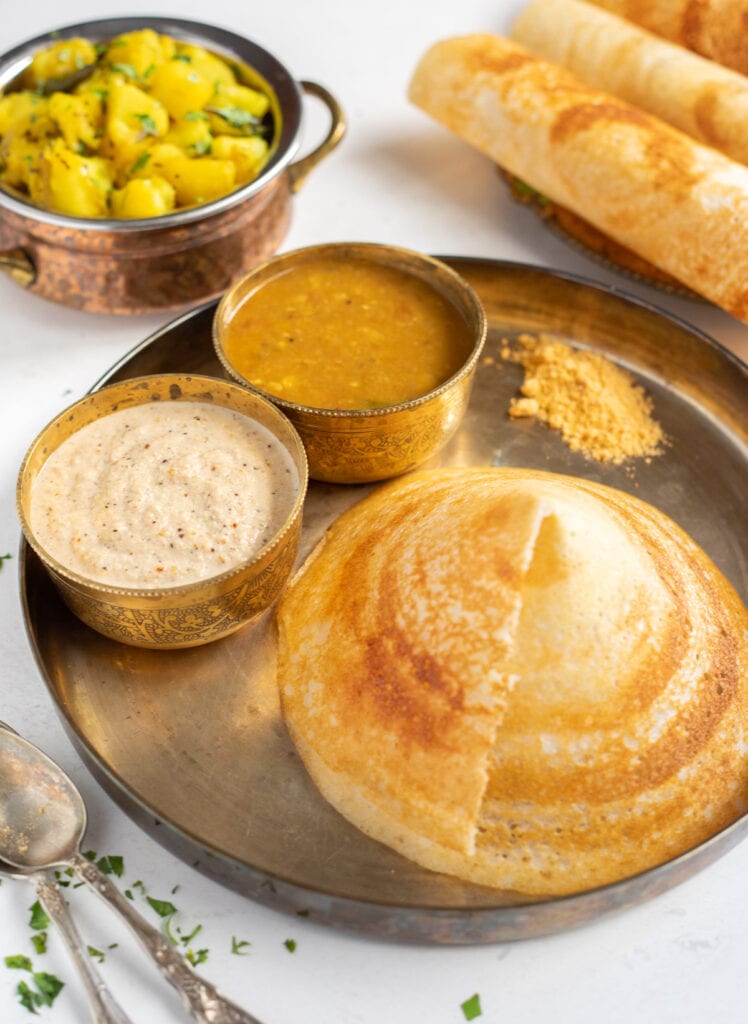
To make a cone-shaped dosa, take the dosa out on a plate without folding it. Then cut the dosa from the center out to any edge using a sharp knife. Pick from the cut edge of the dosa with your fingers and start rolling towards the other edge, and shape it like a cone.
Tips for Perfect Crispy Dosa
- One of the most essential things to make crispy dosa is the perfect batter, so do follow the batter instructions.
- The next is a good pan (tawa) for making dosas. I highly recommend a cast-iron pan or a special non-stick dosa pan.
Common Questions
The ratio for dal and rice I have suggested works great for crispy dosa. Also, use a cast-iron pan and heat it well to get a perfect crispy dosa.
I highly recommend a cast-iron pan or a special non-stick dosa pan. Always keep the dosa tawa separate and only use it for dosa. If you use it for multiple things, it will spoil soon and may not work well for dosa.
This can happen if the cast-iron pan is not seasoned well. Here is a tutorial on how to season a cast-iron pan. I usually keep a separate tawa for dosa. Season it after use.
Also, make sure the tawa is well-heated. Then cool it down slightly by a splash of water, wipe it clean, and spread the batter.
This is most likely happening as the tawa is too hot. Before you spread the batter, lower the heat and spread oil, preferably with a cut onion. This helps to lower the temperature and makes it easy to spread the batter. Wipe the tawa clean, then spread the batter. Right after spreading the batter, increase the heat to medium-high.
Let me know in the comments if you have any questions about making dosa. I would be happy to help. I am looking forward to seeing your dosa recipe pictures. It will bring me so much joy!

How to make Dosa (Crispy Dosa Recipe)
Video
Equipment
Ingredients
- 1/2 cup Urad Dal , dehusked split or whole urad dal gota
- 1 1/2 cup Dosa Rice , or combination of dosa rice + sona masoori rice, idli rice works too (see notes)
- 1 tablespoon Split Chickpeas (Chana dal)
- 1 tablespoon Toor Dal (Split pigeon peas)
- 1/2 teaspoon Fenugreek seeds (Methi dana)
- 1/4 cup Poha (Flattened rice), soak for 20 minutes before grinding
- 1 teaspoon Non-iodized Salt , rock salt (sendha namak)
- 7 tablespoon Ghee or Oil, to cook dosa (half tablespoon for each dosa)
Instructions
Soaking
- Add urad dal, rice, chana dal, toor dal, and methi seeds to a large bowl.
- Rinse till the water runs clear. Soak in about 6 cups of water for 4-5 hours.
- Soak poha in water for about 20 minutes before grinding the batter.
Grinding the batter
- Drain water from the soaked dal, rice, and poha. Add to a high-speed blender jar.
- Add about 3/4 to 1.5 cups of cold water as needed to grind the batter to a smooth paste. Start with less water and add as needed. Transfer the batter to a large steel bowl or the Instant Pot steel insert. Make sure to use a large bowl so there is space for the batter to rise.
- Add salt and mix the batter well using your clean hands for a couple of minutes. You can skip salt here if you live in a warm place. Make sure not to use iodized salt, as that affects the fermentation process.
- The batter consistency should neither be thick nor runny, but rather it should be free-flowing.
Fermenting batter
- Cover the steel bowl with a lid and place it in a warm place. If you live in a cold climate, keep it in the oven with the lights on or on the counter in a warm climate.
- It can take 6-14 hours for the batter to ferment. The time varies depending on where you live. Once the batter is fermented, it should have increased in volume and must be frothy and airy on the top.
- You can check if the batter is fermented well by dropping a teaspoon of batter into a bowl of water. It should float on top and not sink.
- Stir the batter. You can transfer the batter needed to make dosa to a bowl. You can store this batter in the refrigerator for up to 5 days.
Fermenting in Instant Pot
- Place the steel insert in the Instant Pot and cover with a glass lid (do not use the Instant Pot lid, as sometimes batter can overflow and lock the lid).
- Set the Instant Pot to Yogurt mode for 12 hours by pressing the Adjust and + buttons. After the time is complete, the batter will be fermented and ready to use. If the batter has not risen well, ferment it for a couple of more hours.
Making Dosa
- Stir the batter you have taken in a bowl to make dosa. Ensure it has a pouring consistency. You might need to add some water, as sometimes the batter becomes thicker while fermenting. If you skipped salt during fermentation, add it now and mix well.
- Heat a cast-iron griddle (tawa) on medium-high heat. You can also use a non-stick dosa tawa, but cast iron is best for crispy dosa.
- Ensure the tawa is heated well before making dosa. You can sprinkle some water on it, and it should sizzle right away.
- Put a few drops of oil on the tawa and spread it with a paper towel all over the tawa. You can also use an onion cut in half and use the flat side to spread the oil, then wipe it clean with a paper towel. This helps to cool down the tawa and spread the batter in a thin layer. Lower the heat a little while spreading the batter, and change back to medium-high right after spreading the batter.
- Take a ladle full of the batter and pour it at the center of the tawa. Immediately start to spread the batter from the center out in a circular motion in one direction (I prefer clockwise). Try to spread as thin as possible.
- Drizzle oil or ghee around the edges of the dosa and also some at the center. Let it cook until the dosa becomes golden brown and starts to leave or come out from the edges.
- You typically only need to cook one side of the dosa. If you have spread the dosa thick, then you might want to flip it and cook on the other side.
- Use a flat spatula to remove the dosa from the edges. You can roll the dosa or fold it at the center with the spatula. Remove from the pan and serve immediately.
- Before making the next dosa, wipe the tawa with a paper towel. Spread the oil again, then spread the dosa. Then increase the heat to high.
- Serve dosa with sambar, chutney, and potato masala.
Cone-shaped dosa
- Cut the dosa from the center out to any edge using a sharp knife. Then pick one side of the dosa and start rolling, holding one cut edge in your fingers to the other edge, and shape it like a cone. Kids love cone-shaped dosa!


Very well explained. Perfect recipe. Loved it
Hi! Is this recipe Gluten free?
yes, rice and dal both are gluten-free. Hence this dosa recipe is gluten-free.
Please let me have.recipe for coconut chutney & vegetablr sambhar. Thank you.
Hi Rajesh – Below are the recipe links for the 2 recipes:
https://pipingpotcurry.com/coconut-chutney/
https://pipingpotcurry.com/instant-pot-sambar/
I was a bit worried that some guests wouldn’t enjoy vegetarian food, but they were all impressed! The catering team created a menu that everyone loved, even the non-vegetarians.
Excellent recipe and method. First try following your method to the letter and I had great success. Having taught baking and written a few recipes myself, it is not easy to get it right and you did! It is now my go-to recipe and method. Thank you.
Hi Marcella – So happy to hear that. Thank you for sharing it back 😀