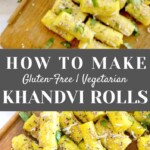

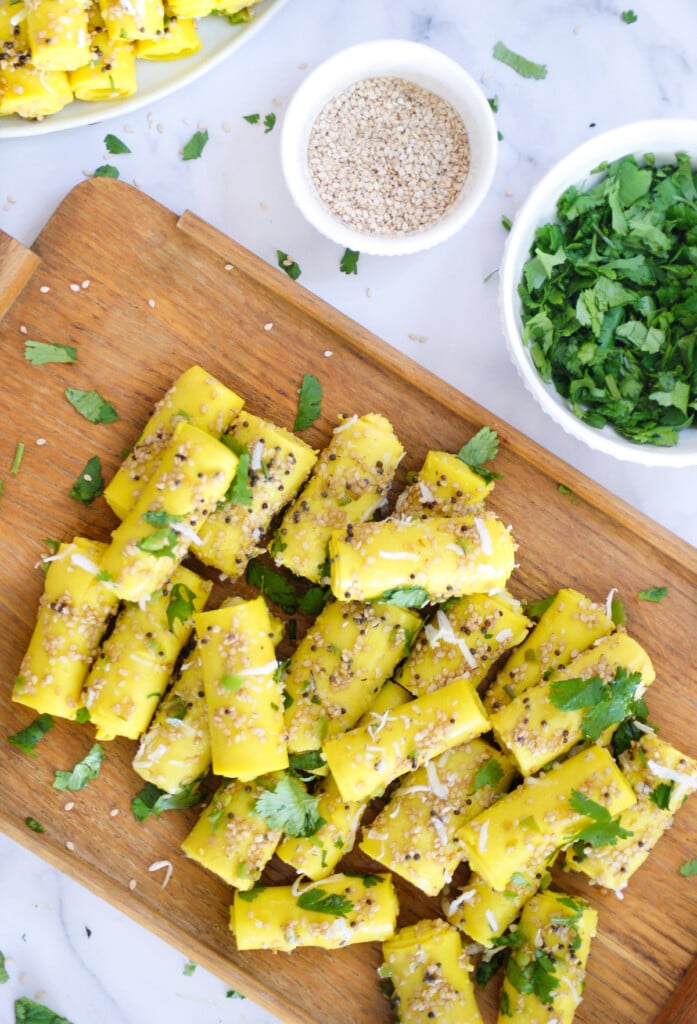
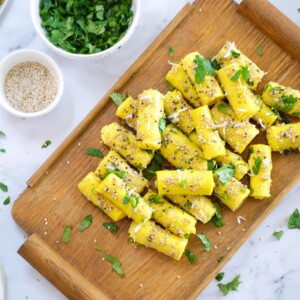
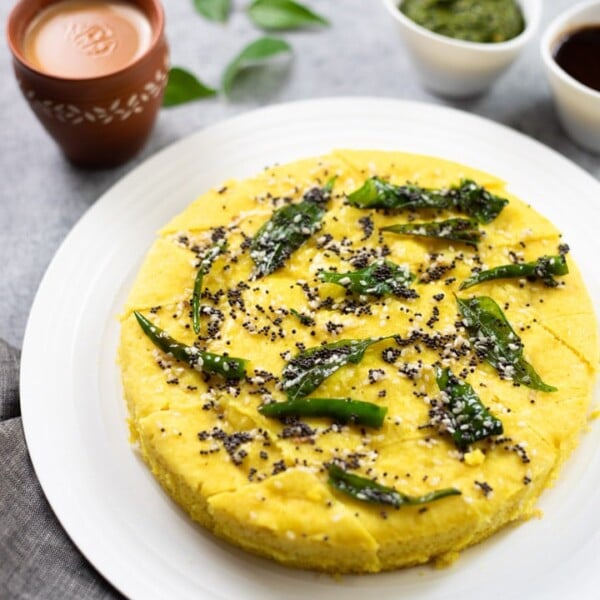
Learn how to make this popular healthy snack from Gujarat – Khandvi rolls. These melts in the mouth, soft and flavorful rolls are made with gram flour and then tempered with mustard seeds, sesame seeds and garnished with cilantro and coconut.
Growing up, I had a lot of Gujarati friends and got many opportunities to try the wonderful food from Gujarat – Dabeli, Khaman, Handvo, Gujarati Dal, and Thepla. All of my favorites!
I have always been a big fan of khandvi. These beautiful yellow rolls, which are soft and pillowy. How can one resist them!
But I was intimidated to try making Khandvi at home. So we would always buy it. But now, since I have learned Khandvi from my friend, I can tell you there is no need to worry and you need to get them rolling!
That said, I would still not call it easy, as it can take a couple of tries to get the batter right and learn to roll the khandvi. But once you have mastered it, you will find that you can make it anytime without needing much time or effort!
Table of contents
What is Khandvi?
Khandvi is a healthy, guilt free savory snack the whole family will enjoy. It is popular in Gujarati cuisine, also known as Dahi Vadi. In Maharashtrian cuisine, this is called Surali Vadi or Suralichi Wadi.
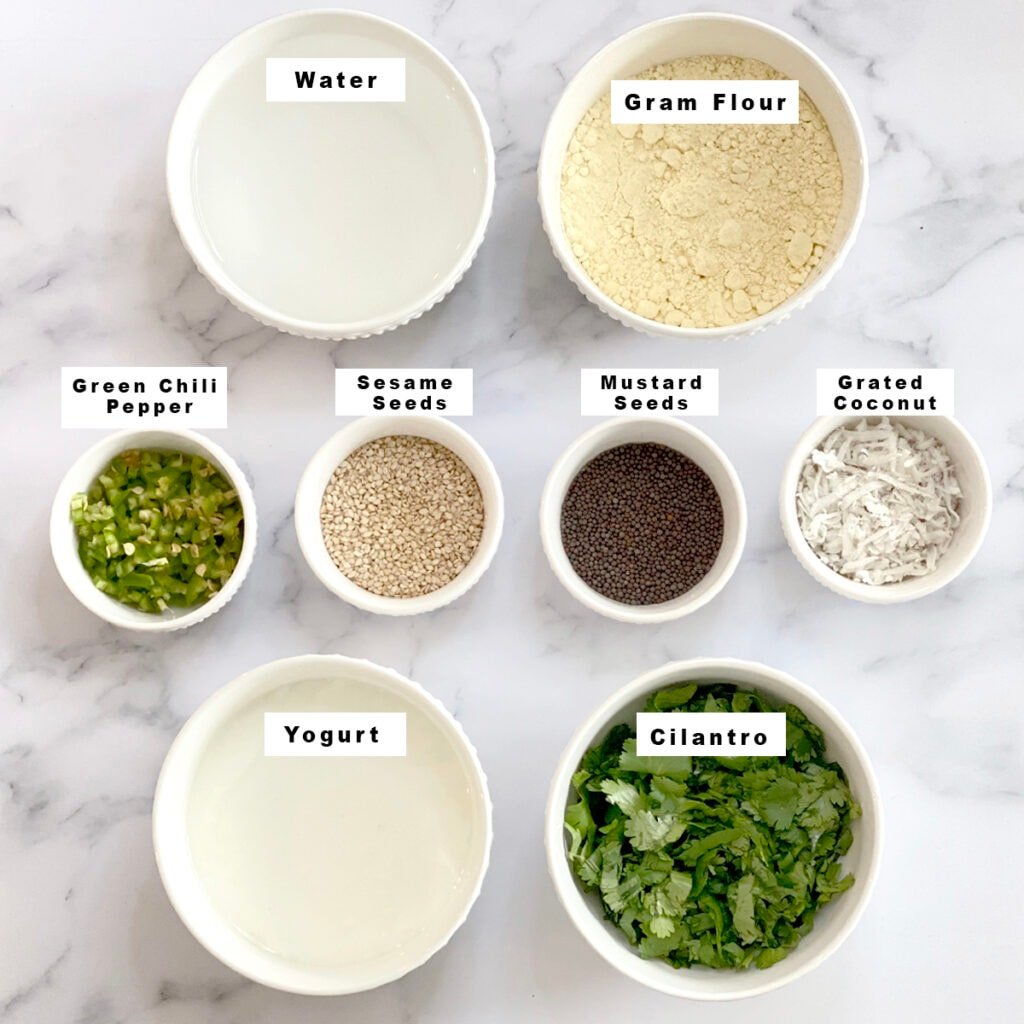
Khandvi needs very basic ingredients, which you might already have in your pantry and refrigerator. It is made with gram flour (besan), yogurt, salt, ginger paste, turmeric powder tempered with mustard seeds, green chili, sesame seeds, and garnished with grated coconut and cilantro.
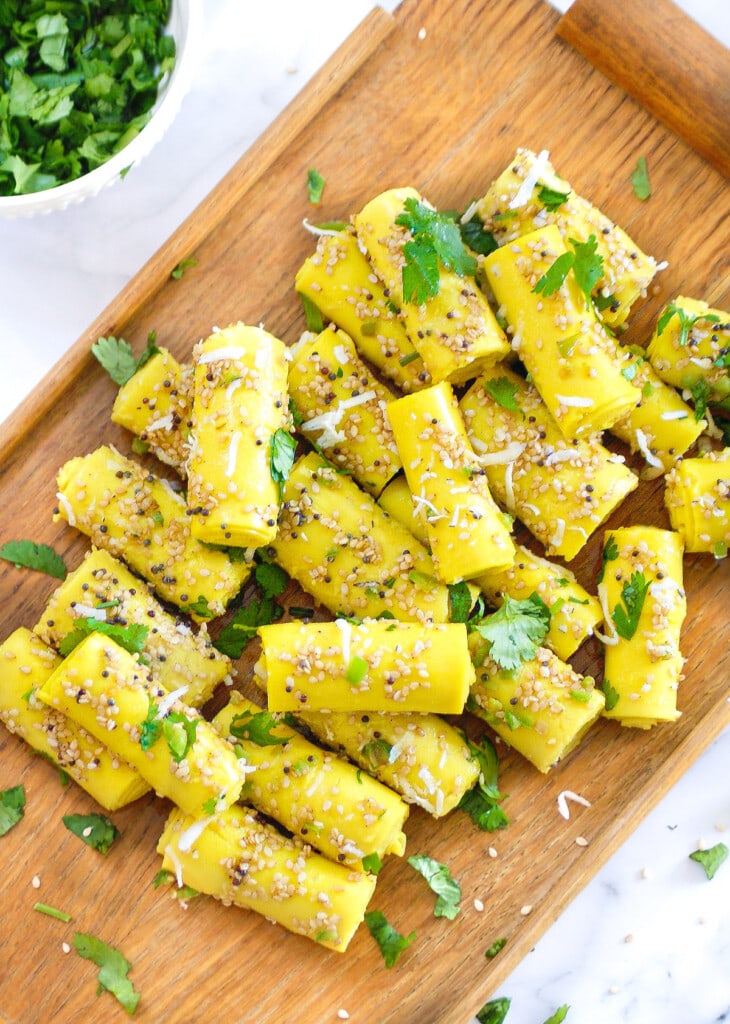
It has a very attractive yellow color, and it is rolled tightly and neatly cut into pieces. You can serve Khandvi for breakfast or as an appetizer with masala chai.
Khandvi is a healthy snack similar to Rava Dhokla and Khaman, the other popular Gujarati snacks.
How to make Khandvi?
Let’s start with gathering the ingredients. It is important to measure the ingredients for khandvi recipe to make the perfect consistency batter.
Khandvi batter can be made on the stovetop or in the microwave. I will share both methods here, so you can choose which ever you prefer!
Khandvi on Stovetop
We will first blend and make a smooth batter, then cook the batter and then make the rolls.
Blend the Batter: In a blender add gram flour, plain yogurt, water, salt, ginger paste, turmeric powder, and blend it well. You can mix and blend using an immersion blender too.
Cook the Batter: In a pan (non-stick preferred), add the blended batter and cook it on a medium flame on a stovetop. Keep stirring continuously, the batter should be thick enough. It will take approximately 5-7 minutes to cook. The timing may vary depending on the intensity of the flame.
It is important to keep stirring – Do not stop stirring as chickpea flour (Besan) will start forming lumps.
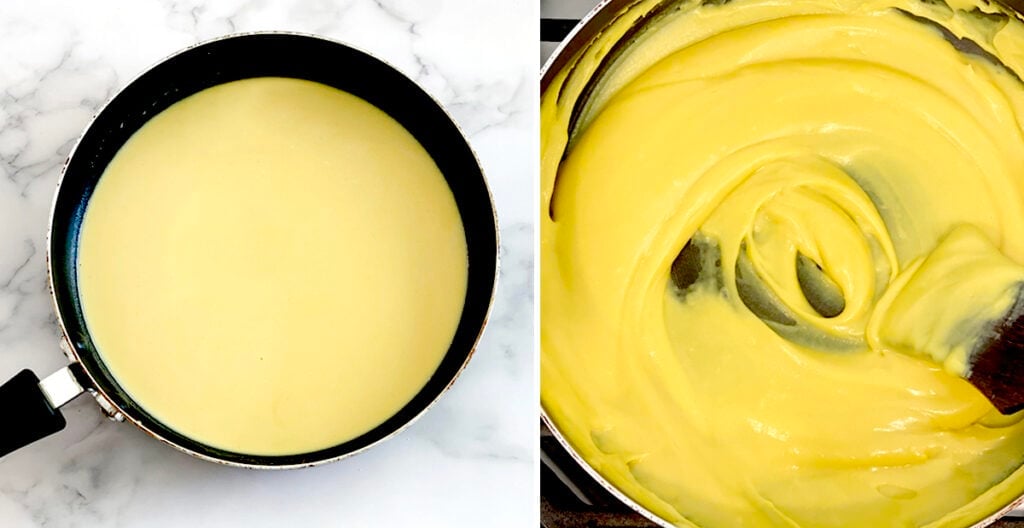
The batter is ready when it thickens and starts to set on the sides of the pan. And it does not fall when you take it in the spatula.
To check whether the batter is thick enough, do a test after 4-5 minutes. Spread few teaspoons of the batter to the plate/mat. Let it cool and then begin to roll, if it doesn’t get rolled up the batter needs to be cooked more. And if it rolls up easily, batter is ready.
It is important to test the batter, else the khandvi might not roll. So don’t skip this step.
Make the rolls: Take a large plate or a silicone mat. If you don’t have a silicone mat, you can also spread the batter on clean marble/granite countertop or the back of a large steel plate.
Put the batter on the edge of the mat and spread a thin layer with a spatula or dough scraper.
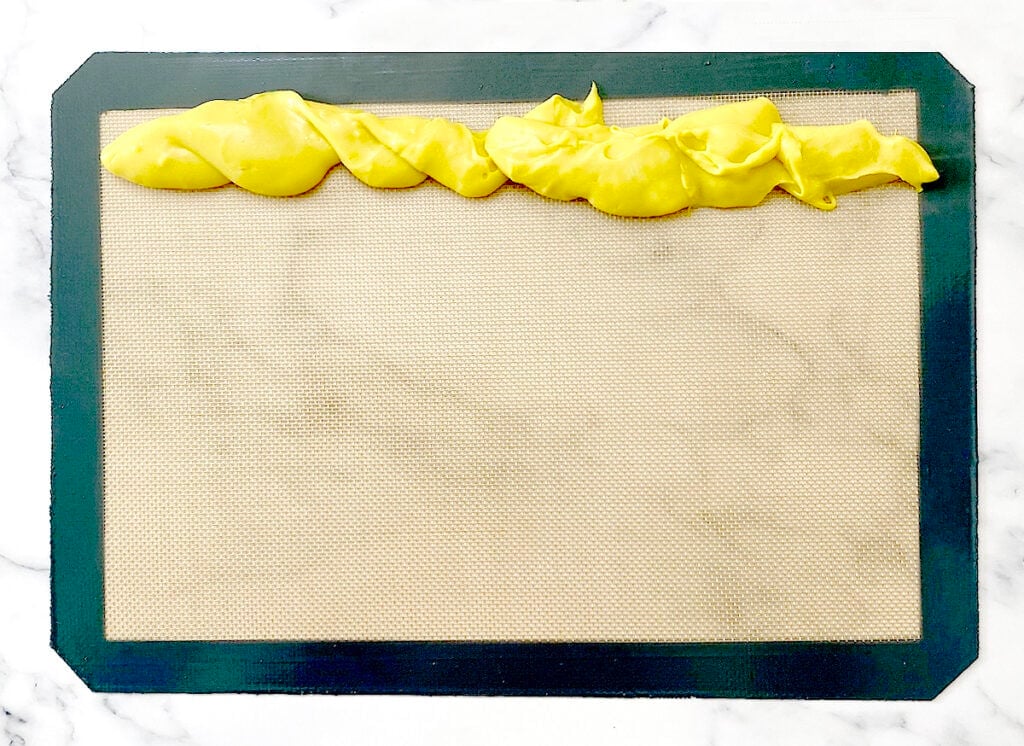
Note: You have to be quick with the batter as we don’t want it to cool down if it’s cooled down it will be difficult to spread it.

Keep it aside for 10 minutes after spreading to let it cool. Repeat the same process for the rest of the batter.
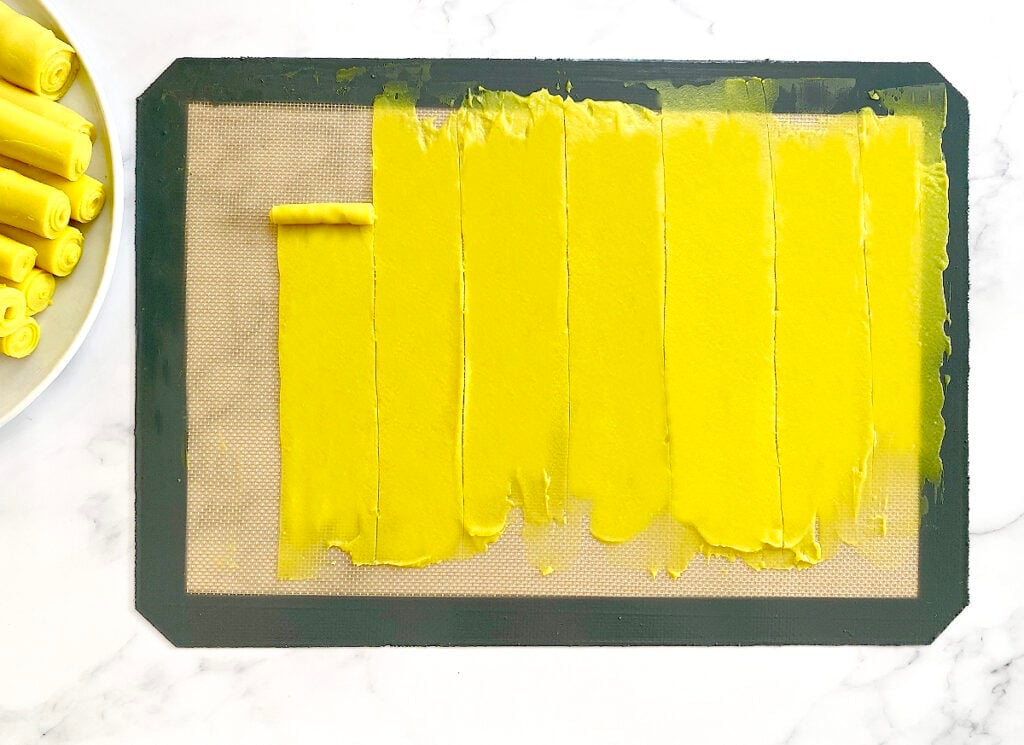
Once the khandvi is cooled. Cut them into equal-sized strips with a pizza cutter or a sharp knife.
Gently roll them tightly and put them in a tray or a serving plate.
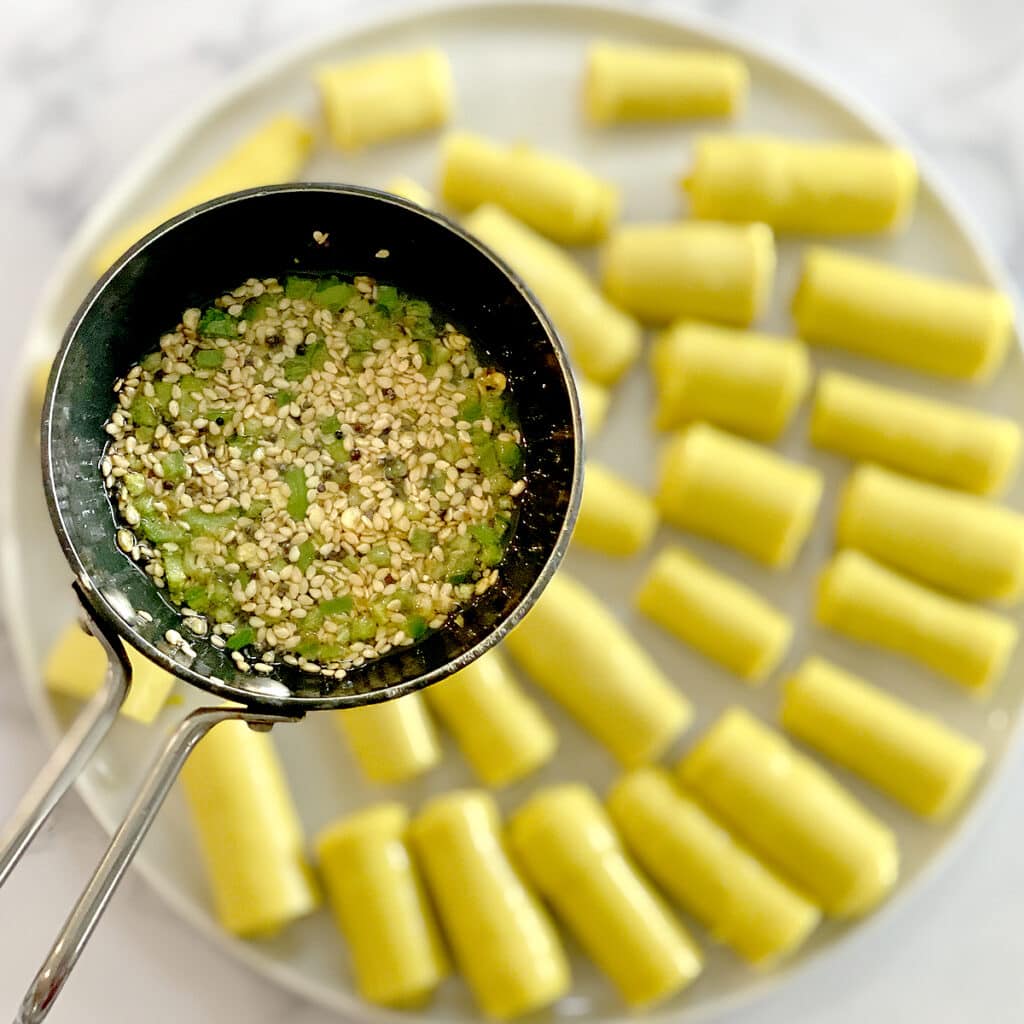
Tempering: Heat oil, mustard seeds let them crackle, add green chilies, asafoetida, sesame seeds. When they change color and crackle, turn off the gas, pour it with a spoon on the khandvi rolls evenly.
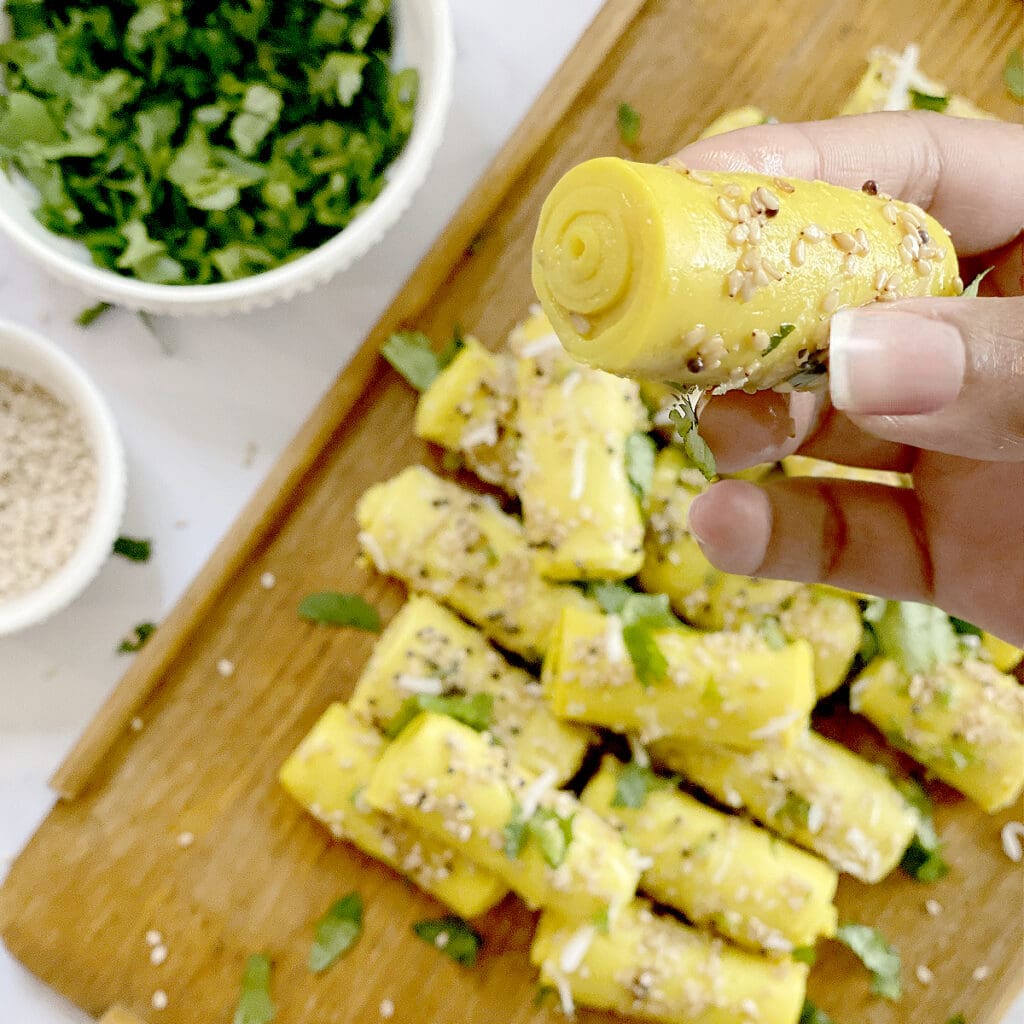
Garnish it with chopped cilantro and grated coconut. Enjoy it as it is or serve it with green chutney or masala chai.
Pro Tips to make perfect Khandvi
- Use a blender or immersion blender to mix the batter. You can use a hand whisk, but make sure there are absolutely no lumps and it blends perfectly.
- To check whether the batter is thick enough, do a test. Spread few teaspoons of the batter to the plate/mat. Let it cool and then begin to roll, if it doesn’t get rolled up the batter needs to be cooked more. And it rolls up easily batter is ready.
- This one is super important – You need to work on the batter quickly. Once it will reach the right consistency, it should be spread very quickly. If the batter gets cold it will start to create lumps and it will be impossible to spread the batter.
- Make sure to follow exact measurements to get the perfect khandvi rolls.
Khandvi in Microwave
In a blender add plain yogurt, water, salt, ginger paste, turmeric powder, and blend it well. In a microwave-safe bowl, add the blended batter and cook for 2 minutes. Take it out stir nicely, it should not create any lumps. Place it back in the microwave and cook for another 2 minutes. Take it out again and stir well.
Microwave again for 2 minutes, take it out and mix it well. Now microwave for the last time for 1 minute and then take it out and the batter is ready.
Note: We have microwaved the batter for total 7 minutes.
To check whether the batter is thick enough, do a test spread few teaspoons of the batter to the plate/mat. Let it cool and then begin to roll, if it doesn’t get rolled up the batter needs to be cooked more. And it rolls up easily batter is ready.
Now roll and spread the batter and make the Khandvi rolls.
Frequently asked questions
Let the Khandvi cool completely. Then it can be stored it in an airtight container in the refrigerator for 2-3 days. When you serve it warm it up in a microwave for few seconds.
Follow the exact measurements. Also, do a plate test for Khandvi rolls – Spread few teaspoons of the batter to the plate/mat. Let it cool and then begin to roll, if it doesn’t get rolled up the batter needs to be cooked more. And it rolls up easily batter is ready.
No, there’s no need to grease the plates. Sometimes the oil can make it harder for the khandvi batter to spread. Even if you do grease, use just a drop of oil for the whole plate.
Check out more Gujarati recipes you might enjoy:
Gujarati Khandvi Recipe
Ingredients
Batter
- 1/2 Cup Gram flour (Besan)
- 1/2 Cup Plain Yogurt, whisked
- 1/4 teaspoon Salt , adjust to taste
- 1/2 teaspoon Ginger paste
- 1/4 teaspoon Ground Turmeric (Haldi powder)
- 1 Cup Water
Tempering
- 1 tablespoon Oil
- 1/2 teaspoon Mustard Seeds (Rai)
- 1 tablespoon Sesame seeds
- 1 pinch Asafoetida (Hing), skip for gluten-free
- 1 Green Chili Pepper, finely chopped*
Garnish
- 1 tablespoon Cilantro leaves, finely chopped
- 2 tablespoon Grated Coconut, optional
Instructions
- In a blender, add gram flour, plain yogurt, water, salt, ginger paste, turmeric powder, and blend it well. You can mix and blend in an immersion blender also.
Stovetop Method
- In a pan, add the blended batter and cook it on a medium flame on a stovetop. Keep stirring continuously, the batter should be thick enough. It will take approximately 5-7 minutes to cook. The timing may vary depending on the intensity of the flame. Note – Do not stop stirring as gram flour (Besan) will start forming lumps.
- To check whether the batter is thick enough, do a test after 4-5 minutes. Spread few teaspoons of the batter to the plate/mat. Let it cool and then begin to roll, if it doesn't get rolled up the batter needs to be cooked more. And if it rolls up easily, batter is ready.
Microwave Method
- In a microwave-safe bowl, add the blended batter and cook for 2 minutes. Take it out stir nicely, it should not create any lumps. Place it back in the microwave and cook for another 2 minutes. Take it out again and stir well. Microwave again for 2 minutes, take it out and mix it well. Now microwave for the last time for 1 minute and then take it out and the batter is ready. Check the batter is ready by spreading on a plate. Let it cool and check that you can roll it. Note: We have microwaved the batter for total 7 minutes.
Make Rolls
- Take a plate or a silicone mat. Put the batter on the edge of it and spread a thin layer with a spatula. Keep it aside for 5-6 minutes. Repeat the same process to the rest of the batter.Note: You have to be quick with the batter as we don't want it to cool down if it's cooled down it will be difficult to spread it.
- Once the khandvi is cooled. Cut them into equal-sized strips with a pizza cutter or a sharp knife. Gently roll them tightly and put them in a tray or a serving plate.
Tempering
- Heat oil, mustard seeds let them crackle, add green chilies, asafoetida, sesame seeds. When they change color and crackle, take off flame, pour it with a spoon on the khandvi rolls evenly.
- Garnish it with chopped cilantro and grated coconut. Enjoy it as it is or serve it with green chutney and masala chai.


Can Greek yogurt be used?
Hi – I have not tried, but believe it will work. You might have to thin it a little bit.
I want to serve khandvi to my guests. Can I but from a store and store it for 3 days ?
I m not sure how old it might be in the store ??
Any thoughts 🙏🙏
Hi Anita – I would suggest to ask the store how long they recommend to store their khandvi.
Awesome recipe!
Hi Bhavna – Thank you! 😊