

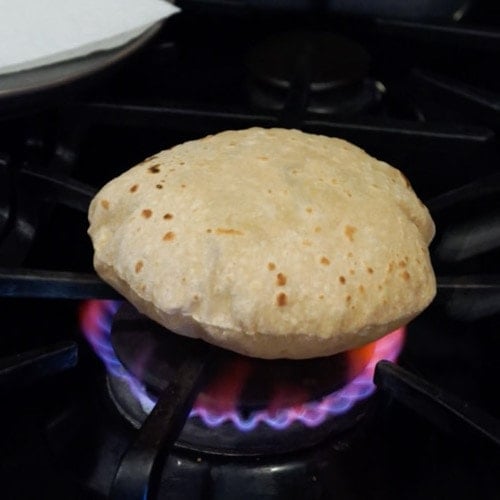
If you have been holding off on making homemade roti (Indian flatbread) because you don’t enjoy kneading the dough with your hands, then here is the best way to make the dough effortlessly using the kitchenaid stand mixer.
Make perfect dough using this electric mixer in just 5 minutes and make soft roti’s every time!
I hate to knead dough by hand…period!
Once the dough is ready, I am happy to make any number of Indian breads such as roti’s, paratha’s, poori’s or even pizza’s.
Making dough can get messy and sometimes sticky, the dough gets in your nails and then it takes time to clean hands.
Once I discovered the kitchenaid stand mixer to make dough, there was no looking back.
No more frozen roti’s or store bought roti’s. I don’t mind making fresh roti’s even multiple times a day.
This is the second most used gadget in my kitchen. I use it to make dough for roti’s, paratha’s, poori and even pizza for my family. This stand mixer also comes in handy for many cakes and baking recipes.
The important thing to note – Make sure to get the dough hook when you buy your kitchenmaid mixer.
Table of Contents
- Watch How to Make Roti Dough using Stand Mixer
- The secret to Soft Roti’s
- Why use the kitchenaid stand mixer for roti dough?
- How to make chapati dough using kitchenaid?
- How to store Roti Dough?
- Mixing veggies or lentils when making dough
- Tips for a perfect chapati dough
- How to make Roti Dough using Stand Mixer? Recipe
Watch How to Make Roti Dough using Stand Mixer
The secret to Soft Roti’s
To make perfect soft roti’s, what you need is perfectly kneaded dough. The dough should be soft and supple, but not sticky.
See my recipe to knead dough by hand and make roti’s.
Here I will show how you can make the same perfectly kneaded dough using the kitchenaid stand mixer.
Why use the kitchenaid stand mixer for roti dough?
There are so many electric dough mixer machines and food processors in the market. I am sure you would be thinking why is kitchenaid the best mixer to make dough for roti/chapati.
Let me share the 5 reasons why I love the kitchenaid mixer:
- No getting hands dirty. The most important reason for me.
- You can see the dough being made in the bowl, and adjust the amount of water needed. It is not a closed machine.
- It takes less than 5 minutes to make the dough.
- You can do other things while the dough is being made. Busy mom’s (and dad’s), this is for you!
- And finally, you can make a variety of doughs using this mixer. Often, I add leftover cooked lentils and chopped or shredded vegetables to make the dough more nutritious. This is great if you have picky eaters (aka kids) in your house 🙂
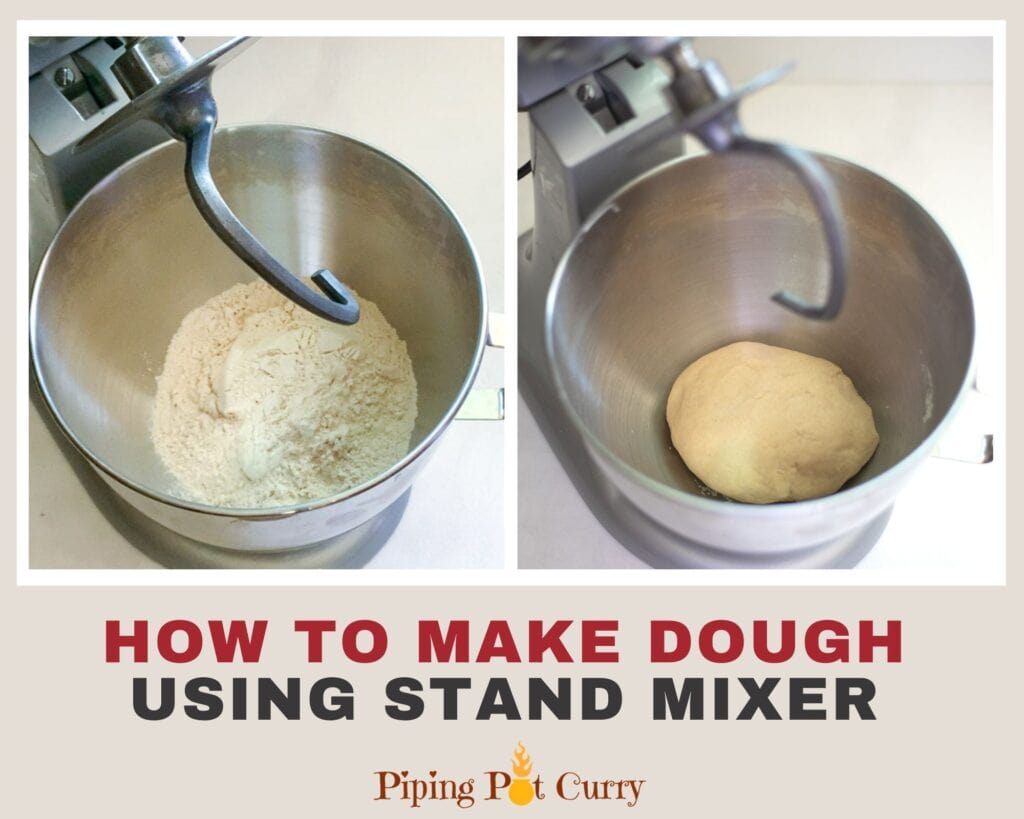
How to make chapati dough using kitchenaid?
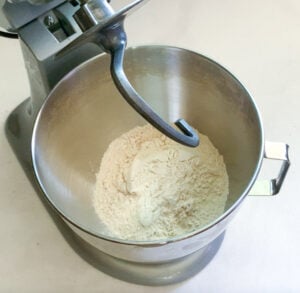
All you need to make roti (also called chapati or phulka) dough is whole wheat flour and water.
You can add salt and some oil, but these are completely optional.
I have a 4.5qt Kitchenaid stand mixer. Other popular sizes are 5qt and 6qt.
In the 4.5qt mixer, you can make dough from 2 cups of flour. In the larger sizes, you might need a minimum of 3-4 cups.
Typically for 2 cups of whole wheat flour, I use 1 cup of water. This 2:1 ratio works perfectly for the Aashirwad Aata I use. If you are using another brand of whole wheat flour, you might need to adjust the amount of water.
That said, always start with a little less water, and then adjust as needed by checking the dough. Start with about 3/4 cup and add more as needed.
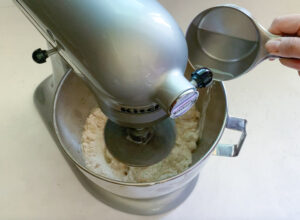
Always use the dough hook and set it to the lowest speed to make dough.
If needed, stop and scrape the sides to incorporate all the atta.
When the dough has almost come together, you can add a teaspoon of oil (or you can do it at the end with your hands too).
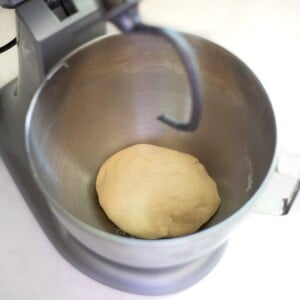
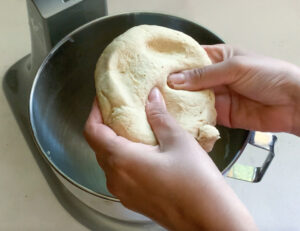
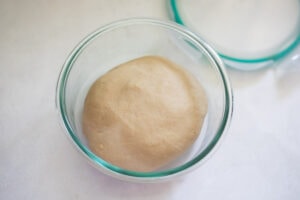
The bowl of the stand mixer will be almost clean once the dough is formed.
Pick up the dough or press your fingers against it to make sure it is soft and pliable. When you press your finger against the dough, it should leave an impression.
You can also take a little oil in your palms and knead the dough for a minute. This will help to make it non-sticky and soft.
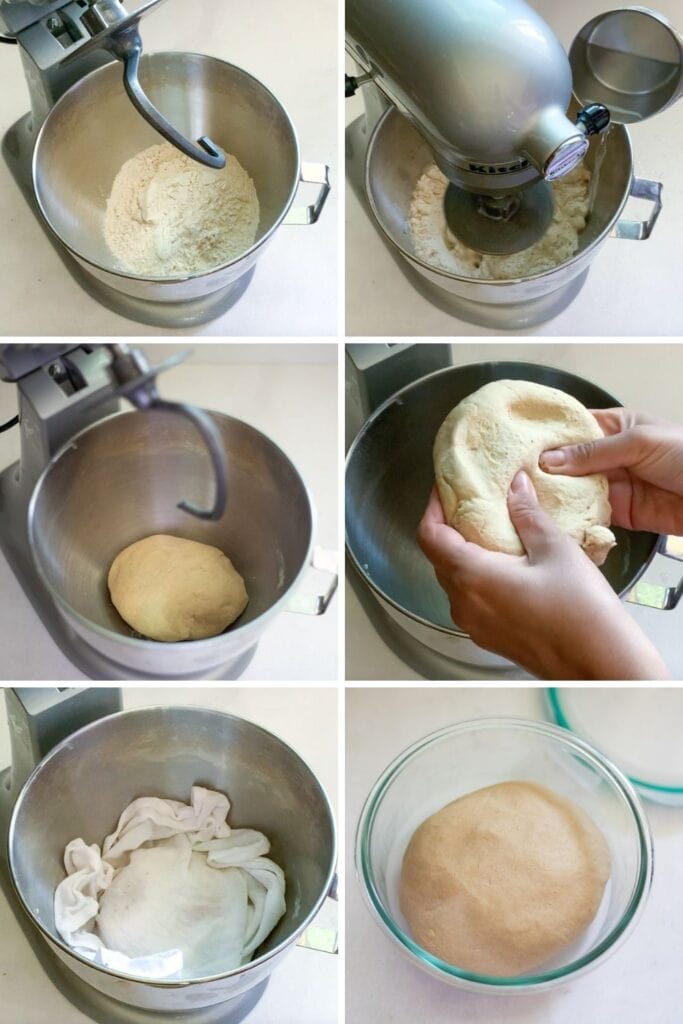
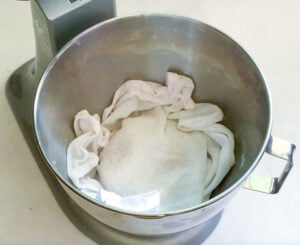
Cover the dough with a damp cloth or cling film for about 15 minutes before using.
Now the dough is ready to store or use right away!

You can store Roti Dough in the refrigerator for up to 2 days in an air tight container. To store for longer, you can freeze it. Divide the dough into small quantities, you can use at one time and store in ziploc bags or freezer safe containers. Thaw overnight in the refrigerator to use.
It is mostly likely due to excess water added when making the dough. You can add a little more flour if the dough gets too sticky. For future, start with a little less liquid.
Also, at the end, you can take a little oil in your palms and knead the dough for a minute might help to make it non-sticky and soft.
How to store Roti Dough?
You can store Roti Dough in the refrigerator for up to 2 days in an air tight container.
To store for longer, you can freeze it. Divide the dough into small quantities, you can use at one time and store in ziploc bags or freezer safe containers. Thaw overnight in the refrigerator to use.

Mixing veggies or lentils when making dough
I love that it is easy to mix veggies or lentils when making dough using kitchenaid stand mixer.
Keep in mind is to start with less water when mixing veggies that release water. eg. radishes (mooli), spinach, fenugreek leaves (methi).
When making dough with lentils, I usually just add just lentils and no water. Depending on the amount of leftover lentils, add water as needed.
This is very convent way to add nutrition to your or your kids meal. My daughter is a picky eater. I feel happy even if she just eats the paratha made with dough that has both lentils or veggies, so she is at least getting some nutrition along with the carbs.
Tips for a perfect chapati dough
- When making dough, always keep the stand mixer at the lowest setting.
- The amount of water you use for making the dough can vary based on the quality and the thickness of flour used (Punjabi’s often use coarse whole wheat flour). So start with a little less water, and add more as needed. Once you have figured out the perfect amount of water, it is okay to add it all at once.
- Check that the dough is to your preferred softness. eg. For roti’s you want soft dough, while for poori’s a little less soft works better.
- Once ready, cover the dough and let it rest for at least 15 to 30 minutes before using.
Hope you enjoy making dough using the stand mixer. I assure you once you give this a try, there is no going back!
Here are my roti, paratha, paneer paratha and aloo paratha recipes with all the tips and tricks to make them perfect every time.
How to make Roti Dough using Stand Mixer?
Video
Equipment
Ingredients
- 2 cup Whole Wheat Flour , if using 6qt stand mixer, double the quantity in this recipe.
- 1 cup Water, start with little less and adjust as needed
- 1 teaspoon Oil, optional
Instructions
- Add the whole wheat flour to the mixing bowl of the stand mixer. If you like, you can also add salt at this time.

- Attach the dough hook attachment. Start the mixer at the lowest speed.
- Add a little less than 1 cup of water to the bowl while the mixer is running.

- In about 2-3 minutes, the dough will start coming together. Keep running the mixer at the lowest speed. If needed, you can stop the mixer and scrape the dry flour from the sides of the bowls using a spatula (I did not need to do this).
- (Adjustments) You can also stop the mixer and check consistency and add 1-2 tablespoon additional water as needed to form a soft dough. If the dough has become sticky, then you might want to add a little more flour.

- (optional) Once the dough has formed completely, add the oil, while the mixer is running. This is just to make the outside less sticky and easier to store. You can also apply oil by hands once the dough is formed.

- Stop the mixer. Cover with plastic wrap or a damp cloth and set aside for 15 mins.

- Once the dough has rested for some time, you can start making roti/phulka or paratha or store the dough in an air tight container in the refrigerator for later use.


Thanks for the guide. Just a small question- No need to increase the speed at all? Always on the lowest setting?
Hi Shakti – I always keep on the lowest setting, and it works perfectly. If you want to speed things up, you can increase speed initially, but once the dough starts working, it is better to keep on low setting.
u dont use stand mixer for chapatti dough. no need. will take u more time cleaning.
roit.dough takes less than 5 mins by hand.
chappati flour (atta, golden temple, etc)
oil
boiled water cooled down to warm temp.
mix it all by hand, lil bit of water at a time n just roll into smooth ball.
no need to “knead” dont need to press hard, just light pressure to mix.
takes less than 5 mins.
cover once done let it sit while u setup chakla n clean table cloth to lay the rotis.
roll them out flat n thin, keep some AP flour to dust while rolling, cover on cloth, repeate till all done.
next up, tava & roasting grill + flat metal spatual, cooked on med high heat finished on med heat.
its a craft takes yrs to “perfect”
most south asian women start learning this as little girls so by the.time theyre married/with kids/adults they can whip up 30 rotis in less than 30 mins. and yes, many boys/males also learn this.
Would this recipe work if any paratha stuffing (like aloo, mooli or paneer) is also added to the mixer while the dough is mixing? Or should the stuffing be added manually after the mixer has made the dough?
Hi Natalie – The stuffings such as potato and paneer are filled in after the dough is rolled on a flat surface. So I would not suggest adding them. Other mix-ins such as grated carrots, grated mooli, chopped spinach or fenugreek leaves works great (I do it all the time). You can also add cooked yellow lentils to make the dough more nutritions. You will need to adjust and add water as needed after the dough starts binding.
Meeta i love your fantastic recipes! Thank you for the roti recipe.You are amazing !
Hi – So happy to hear that. Thank you for sharing it back 🙂