
Roti, also known as Chapati or Phulka, is a staple in most Indian homes. This whole wheat Indian flatbread is typically enjoyed as a side with curries or lentils. Let’s learn how to make soft roti’s every time!

I have been sharing so many Indian Instant Pot Recipes. However, I realized that I have not shared any Indian bread recipes. We eat roti almost every day, so it is important enough to get its limelight on the blog. So, I have given the instant pot recipes a break and posted a couple of Indian flatbread recipes. Here is another popular Indian flatbread recipe – Paratha.
Table of Contents
- Watch How To Make Soft Roti/Chapati
- What is Roti?
- What is the difference between roti, chapati, and phulka?
- Is Roti Vegan?
- Which flour is best to make roti?
- How to make roti dough?
- How to roll round Roti?
- How to cook phulka?
- How to make Roti or Chapati?
- Tips to make soft roti
- How to store roti and dough?
- How to reheat roti?
- How to pack roti for lunch in a box?
- How To Make Soft Roti / Chapati? (Whole Wheat Indian Flatbread Recipe) Recipe
Watch How To Make Soft Roti/Chapati
What is Roti?
Roti (also known as chapati or phulka) is a round flatbread native to the Indian subcontinent made from stoneground wholemeal flour, traditionally known as atta, and water that is combined into a dough. There are many variations, and it is eaten in many countries. In India, the most popular is this flatbread roti. The other popular variations are paratha, puri, and makki ki roti.
In North India, we eat roti almost every day with some vegetable or meat curry or lentils. Each person eats 2-4 roti, depending on their diet.
Just 2 ingredients are required to make roti: whole wheat flour, also called atta, and water. There is no leavening agent needed in this flatbread. Some people add salt and some oil. However, both are not necessary to make roti. Roti looks very similar to a tortilla.
Even within India, there are variations in how roti is made. Some regions or cultures make them thinner, while others are a bit thicker. e.g., Punjabis make roti thicker, while Gujrati from western India makes roti very thin. I will share the easy step-by-step recipe for North Indian-style roti below.
What is the difference between roti, chapati, and phulka?
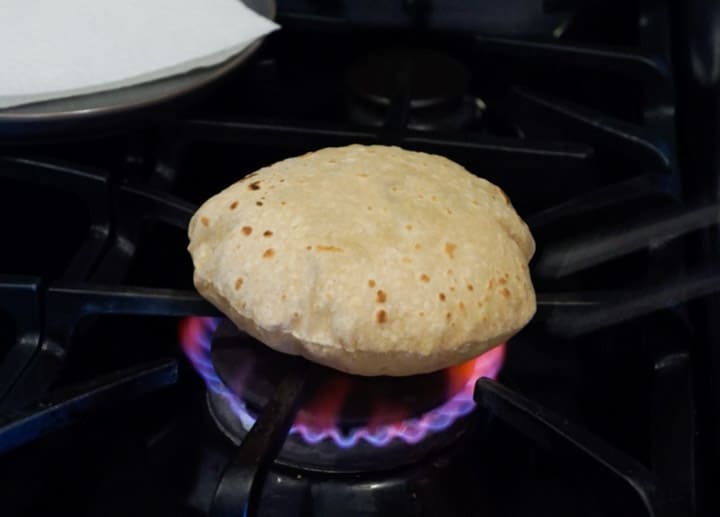
They are all almost the same but with some minor differences. Roti and chapati can be used interchangeably. They are cooked on the Tawa (concave pan or griddle). Phulka is cooked on one side on a tawa and the other side on an open flame. Due to the high cooking temperature, air is trapped inside the roti to make it puff like a ball. I will show both variations in this recipe.
Is Roti Vegan?
Yes, it is made with just 2 ingredients – whole wheat flour and water. Simply replace the ghee applied at the end with oil or vegan butter.
Which flour is best to make roti?
After trying many whole wheat flours from Indian grocery stores, I prefer Sujata Chakki Atta or Aashirvaad Select Sharbati Atta or Aashirvaad Whole Wheat Atta.
I have also tried to make whole wheat flour at home from wheat berries using a grain mill (Nutrimill), and it works great to use the flour for making roti. It is a bit coarse than the store-bought flour.
How to make roti dough?
- In a large bowl or flat plate with high edges, take 2 cups of whole wheat flour.
- Slowly start adding water and mix with your hand. Don’t add all the water at once. Keep adding water as needed while mixing.
- Once the dough starts to form, do not add more water. I added a bit more than 3/4 cup of water to make the dough. The amount of water will vary depending on the brand of whole wheat flour.
- Make the dough smooth by kneading it with your fist. Add some water to your hand and knead. 2-3 times. The more you knead the more softer the chapatis will be. When you press your finger against the dough, it should leave an impression. This is the right consistency of the dough.
- Cover with a damp cloth or plastic wrap and let it rest for at least 15 mins and up to 30 mins. This helps gluten to release and the dough becomes more elastic. Open and knead once again.
- You can apply some oil to make the dough edges less sticky. But this is not necessary to get soft rotis. Dough should be soft. not hard (hard is best for puri’s). Same dough for roti can be used to make paratha/aloo paratha.
If you want to make roti dough using a mixer, here is my easy recipe to make dough using the kitchenaid stand mixer.

Possible issues with roti dough –
- If the dough gets too sticky, it means more water got added. Add a tablespoon of flour at a time and knead again till all the flour is absorbed.
- If the dough gets too hard, it means less water was added. Add a tablespoon of water at a time and knead again. The dough should be soft enough that if you press your finger against the dough, it leaves an impression.
Check out the recipe to make Roti Dough using an electric stand mixer.
How to roll round Roti?
What do you need to make roti?
- Marble or wood base (called chakla in Hindi).
- Rolling pin (called belan in Hindi)
- Tawa, which is a concave flat pan to make the roti’s. You can also use a cast iron pan.
- Tongs (called Chimta in Hindi) for phulka or Flat spatula (Turner) for chapati
Steps to roll roti round
- Keep the rolling board and rolling pin ready. Keep a bowl of dry flour and a bowl of ghee to apply on the roti once it is ready. You want to roll and cook the roti’s at the same time, so the rolled dough does not become dry.
- Make small balls from the dough by rotating between your palms. Make the ball a bit flat.
- Dip a ball in dry flour, place on the marble or wooden base (chalka) and roll with the rolling pin.
- Do not apply too much pressure while rolling. Apply equal pressure on all sides while rolling. When you roll with gentle hands, the dough flattens and moves in circles with the rolling pin. You can also turn the roti with your hands at 90 degrees multiple times while rolling, so that it forms a circle.
- Apply dry dough about half way through on both sides and roll again. This process takes practice, so be patient!
- Dust off the flour by flipping the roti between both your palms to remove any extra dry flour.

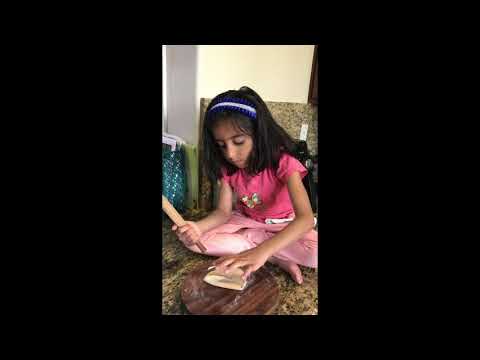
Just for fun, here is my daughter rolling roti’s. She really enjoy’s helping mama in the kitchen. Rolling roti’s is very much like playing with play dough 🙂
How to cook phulka?
- Pre Heat a Tawa (griddle) on medium-high flame.
- Pick the roti and flip between both your palms to remove any extra dry flour. Transfer roti on the tawa by taking it on your palm.
- Turn when the color starts changing and small air pockets form in about 5 seconds.
- For the other side, now we want to cook until there are some brown spots on the roti (see bottom left pic in below collage).
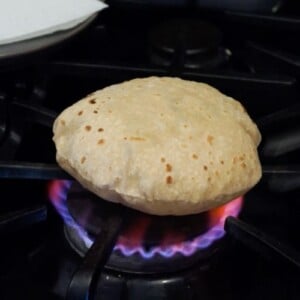
- Now you can cook directly on flame. Use tongs (chimta) to turn from side to side until the roti puffs.

How to make Roti or Chapati?
If you don’t have a flame or are doing induction cooking. Then you turn the roti and cook until there are brown spots on the other side too. Press gently with a flat spatula, which will help the roti to fluff up. Turn couple of times while cooking and pressing gently.

I usually keep the roti after cooking on a paper towel or a thin cloth in a plate. Optionally apply ghee and keep stacking them. Then store in a hot casserole until serving (within a few mins or an hour). Roti’s are best served hot!
Tips to make soft roti
- Knead the dough well, it should be not too hard and not too soft/sticky.
- Let the dough rest covered with a damp cloth for 15-30 minutes, so the gluten is released and it becomes more pliable.
- Roll the dough with soft hands, applying equal pressure on all sides.
- Apply ghee or oil to keep the rotis soft for longer.
- When learning to make roti, you might need to use more dry flour. But always dust off any excess flour before cooking on the Tawa, otherwise the dry flour can make the roti dry and hard. As you get experienced, only apply dough once and roll the roti.
- Making roti needs lots of practice. So be patient and keep practicing.
How to store roti and dough?
- Storing Dough: Refrigerate in air-tight container and use within 1-2 days. After about 2 days, the dough color starts to become brownish on the outside. To make roti, get the dough to room temperature before using (else it might seem harder to roll)
- Storing Roti: Cooked roti can be refrigerated for 2-3 days. They might stick together due to the ghee. So let them come to room temperature or heat to separate them. You can also store in freezer for longer shelf life. Place parchment paper between roti’s and then place them in a freezer bag like Ziploc.
How to reheat roti?
- Microwave: Keep on a paper towel and heat for 5-10 seconds.
- Stovetop Tawa: Heat each side until the roti is soft again. Apply some ghee to make it fresher tasting.
How to pack roti for lunch in a box?
- Do not pack hot off the griddle roti in a closed box. It will get soggy. Place the cooked roti on a paper towel, apply ghee. Let it cool a little (not completely). Then pack in an aluminum foil along with the paper towel.

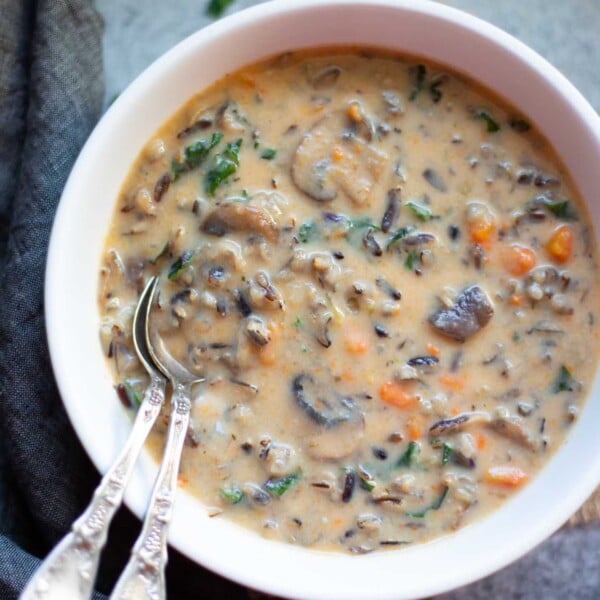
Pair roti with any curry or lentils. Here are a few favorites:
How To Make Soft Roti / Chapati? (Whole Wheat Indian Flatbread Recipe)
Video
Ingredients
- 2 cups Whole wheat flour
- 3/4-1 cup Water
- 1 teaspoon Oil, (optional)
- 1/4 cup Whole wheat flour, to roll roti
- Ghee , to spread on cooked roti (optional)
Instructions
Make Roti Dough
- In a large bowl or flat plate with high edges, take the whole wheat flour. Slowly start adding water and mix with hand. Don’t add all water at once. Keep adding water as needed, while mixing.
- Once the dough starts to form, do not add more water. It takes a little more than 3/4 cup of water to make the dough. The amount of water will vary depending on the brand of whole wheat flour.
- Make the dough smooth by kneading it with your fist. Add some water to your hand and knead 2-3 times. When you press your finger against the dough, it should leave an impression. This is the right consistency of the dough.
- Cover with a damp cloth or plastic wrap and let the dough rest for at least 15 mins and up to 30 mins. This helps gluten to release and the dough becomes more elastic. Open and knead once again.
- You can apply some oil to make the dough edges less sticky. but this is not necessary to get soft rotis.
Roll Roti
- Keep the rolling board and rolling pin ready. Keep a bowl of dry flour and a bowl of ghee to apply on the roti once it is ready. You want to roll and cook the roti’s at the same time, so the rolled dough does not become dry.
- Make small balls from the dough by rotating between your palms. Make the ball a bit flat. Dip a ball in dry flour, place on the marble or wooden base (chalka) and roll with the rolling pin.
- Do not apply too much pressure while rolling. Apply equal pressure on all sides while rolling. When you roll with gentle hands, the dough flattens and moves in circles with the rolling pin. You can also turn the roti with your hands at 90 degrees multiple times while rolling, so that it forms a circle. Apply dry dough about half way through on both sides and roll again.
Cooking phulka
- Preheat a Tawa (griddle) on medium-high flame. Pick the roti and flip between both both palms to remove any extra dry flour. Transfer roti on the tawa.
- Turn when the color starts changing and small air pockets form in about 5-10 seconds. For the other side, now we want to cook until there are some brown spots on the roti.
- Now you can cook directly on flame. Use tongs (chimta) to turn from side to side until the roti puffs.
Cooking roti / chapati
- If you don’t have a flame or are doing induction cooking. Follow phulka steps as above. Then turn the roti on tawa and cook until there are brown spots on the other side too. Press gently with a flat spatula, which will help the roti to fluff up. Turn couple of times while cooking and pressing gently.
- Take the phulka / roti / chapati and place on a paper towel (or a thin cloth) on a plate and apply ghee. Repeat process of rolling and cooking for rest of the dough.
- Enjoy roti / phulka warm with any curry, dal or vegetables.
Notes
- If the dough gets too sticky, it means more water got added. Add a tablespoon of flour at a time and knead again till all the flour is absorbed.
- If the dough gets too hard, it means less water was added. Add a tablespoon of water at a time and knead again. The dough should be soft enough that if you press your finger against the dough, it leaves an impression.
- Knead the dough well, it should be not too hard and not too soft/sticky.
- Let the dough rest covered with a damp cloth for 15-30 minutes, so the gluten is released and it becomes more pliable.
- Roll the dough with soft hands, applying equal pressure on all sides.
- Apply ghee or oil to keep the rotis soft for longer.
- When learning to make roti, you might need to use more dry flour. But always dust off any excess flour before cooking on the Tawa, otherwise the dry flour can make the roti dry and hard. As you get experienced, only apply dough once and roll the roti.
- Making roti needs lots of practice. So be patient and keep practicing.
- Storing Dough: Refrigerate in air-tight container and use within 1-2 days. After about 2 days, the dough color starts to become brownish on the outside. To make roti, get the dough to room temperature before using (else it might seem harder to roll)
- Storing Roti: Cooked roti can be refrigerated for 2-3 days. They might stick together due to the ghee. So let them come to room temperature or let heat to separate them. You can also store in freezer for longer shelf life. Place parchment paper between roti’s and then place them in a freezer bag like Ziploc.
- Microwave: Keep on a paper towel and heat for 5-10 seconds.
- Stovetop Tawa: Heat each side until the roti is soft again. Apply some ghee to make it fresher tasting.
- Do not pack hot off the griddle roti in a closed box. It will get soggy. Place the cooked roti on a paper towel, apply ghee. Let it cool a little (not completely). Then pack in an aluminum foil along with the paper towel.


when making your own flour using nutrimill, what kind of wheat did you use?
Ideally, hard white wheat berries are best for indian roti’s.
Hi Meeta…thanks for your tips on maki rotis…have a question…will it be possible for you to share that what was the scoop size of the dough ball and to what thickness did you roll it…for example 2tbsp scoops of dough rolled to 1mm thickness or rolled out to a 7cm chapati…that would really be helpful 🙂
Can you only cook it in the pan and not on the fire from the stove?
Hi Marnita – Sure, you can do that. Check the section of how to make chapati in the post. I have included step by step pictures too.
Thank you! It’s an understatement to say this takes lots of practice, but your recipe writeup is so encouraging and motivates me to continue working on this very important skill. Indian cuisine is my favorite, it’s all I need. I want to be able to cook a little better just in case my potential future life partner needs a day off from the kitchen. 😉 Thanks, and your daughter is so precious!
Hi Patricia – Thank you. So glad to hear you found the post helpful!
great article for roti chapati, thanks for sharing useful information
Great recipe and the video is extremely helpful to follow along! The link for the whole wheat flour takes me to a page that says the item is ‘currently unavailable’.
Hi Paige – Glad to heat you found the recipe and video helpful. I just fixed the link to a product that is available.
Can you use all purpose flour?
Hi Nicole – I would not recommend all-purpose flour for roti. It won’t be the same texture.
This is awesome, I used Aashirvaad Select Atta to make the phulkas and it was soft and tasty.
Hi Aarthi – Happy to hear that. Thank you for sharing 😊
Wow! This is really a great blog. Thanks for this one.
God bless u, for the first time i got my phulkas right! No-one ever really mentioned the no pressing part when rolling the dough thank u!
Hi Meghna – So good to hear that. Thank you for sharing back! 🙂
Hi meeta,
Yesterday I made roti with chakki atta in Bahrain.I used 1 cup water in 2 cups flour ,mixed with and kept 30 mins by covering with a wet towel. But when making dough the mix is too sticky.Then I added dry flour again.then ok. So don’t add water 50% of the atta.I think 0% is Ok.Any how I learned well how to make Chapati/Roti through your training.Great thanks for service.
G.K.Pillai,Bahrain